The zone system in photography is often ignored because it is misunderstood or appears to be too difficult. In this article I will teach you how to use it. I will also explain the benefits of learning to use the zone system.
Concentration on exposing the main subject of your photo was the focus of the previous article in this series. In this article, I will introduce you to a great tool. The Zone System. It will help you plan, make, and post-process your photos.
Identify Your Main Subject
Once you’ve identified your main subject you will use it as a foundation to build your exposure choices on. If you haven’t read the previous article in this series, I suggest you do so. It will enable you to make better sense of this one.
Your camera, including the exposure meter, does not know what you are photographing. It cannot know which element in your frame is the main subject. At best, it can only guess.
Recognizing the most vital element in your composition first, you’ll then make your exposure reading and settings. With manual mode you have full control. You can adjust your aperture, shutter speed, and ISO so your main subject renders how you want it to.
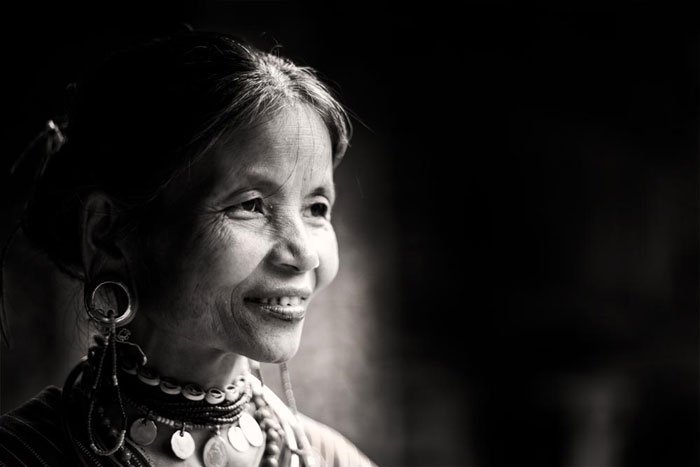
Look at the light on your subject and understand how your camera will record the scene. In this photo, the light is hard and isolates the man’s face and the bowl of noodles. When the light is strong like this your camera will not record every part of the composition with good detail. The capability of the sensor is much more limited than our eyes.
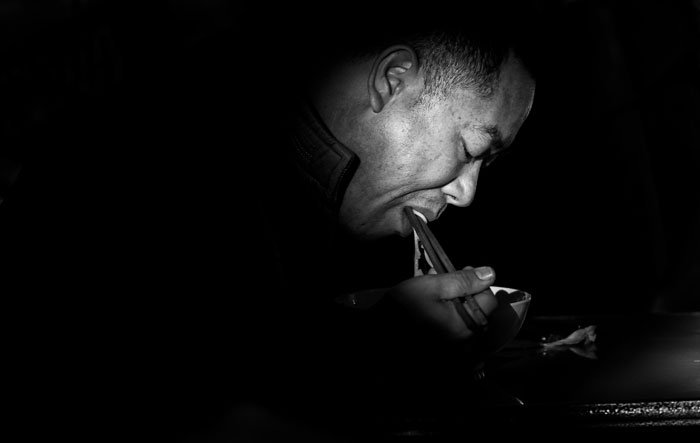
My eyes did not see this scene the way it looks in the photo. I could see much more detail in the shadow areas. My intent was to record the brightest parts of my composition so they contained detail. I knew anything in the shadows would fall into darkness.
Learning to apply the zone system will help you see and make exposure choices that are more radical than your camera will do if left on auto.
What Is The Zone System?
Photographers Ansel Adams and Fred Archer developed the zone system. They based it on sensitometry, the scientific study of light-sensitive materials. They wanted to have a more systematic approach to determining exposure and development of film.
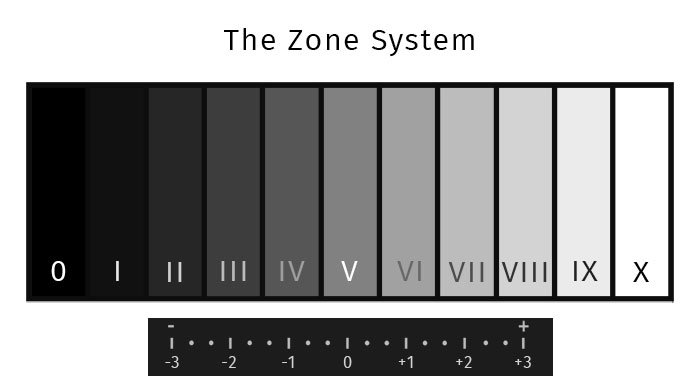
The Zone System divides tone values between black and white into 9 zones with Roman numerals designating the value of each zone, (except black. 0 is not a Roman numeral.) Black is 0 and white is X. Middle gray, the value exposure meters are calibrated to ‘see’ is zone V.
Between each zone there is one photographic ‘stop’ difference.
This may seem over complicated. If you follow through and learn to understand it, you’ll be more adept at making well-exposed photographs.
How Can You Make Practical Use of the Zone System?
Much of what’s written about the Zone System is extremely technical. This makes it difficult for many people, including myself, to understand and implement fully.
I prefer to treat the Zone System as pirates treated the Pirates Code – more guidelines than actual rules.
Breaking it down so you can make practical use of it, is necessary.

You Must Use Your Spot Meter
Switching to spot metering will allow you to take an accurate light reading from the most important part of your composition. Using any of the other metering modes is problematic because the camera will add its own calculations to the reading before it shows you the data.
Place your spot on the part of your composition you’ve decided is most important.
Set Your Exposure
Adjust your aperture, shutter speed, and ISO so the exposure meter is zeroed.
Whatever tone the area of your composition is, the meter will think it’s middle gray. This is how exposure meters are calibrated.
It means that if your subject is white and you take a spot meter reading from it, your camera will render it as middle gray in the resulting image.

Likewise, if your subject is black and you meter it the same way, it will render as middle gray.
Decide the Tone You Want
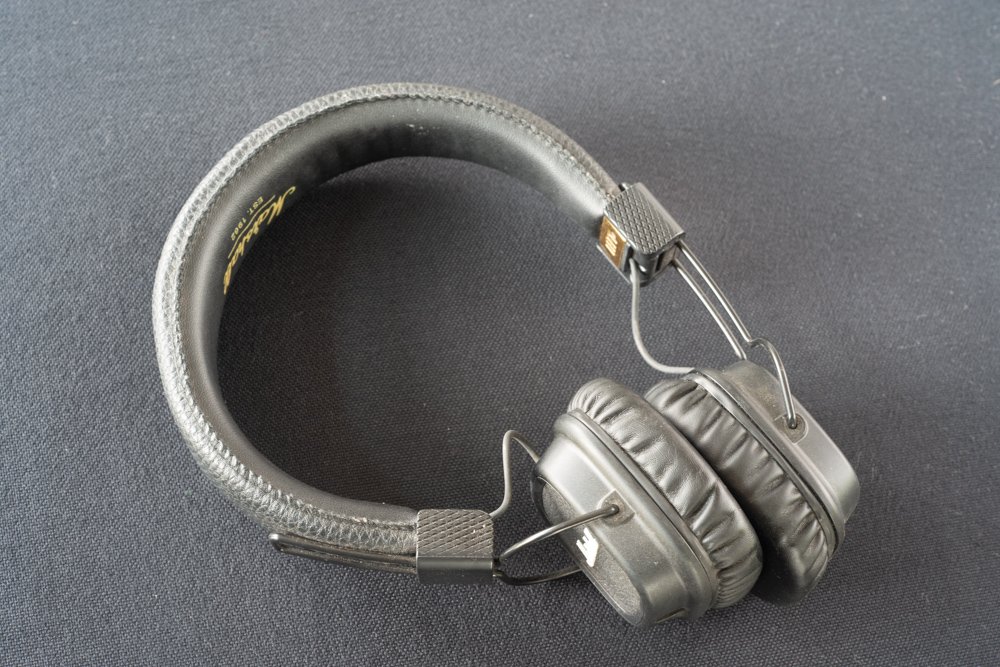
Certainly the headphones are not this shade of gray, they are black. Looking at the Zone System Chart you can see that Zone I (one) will render close to black. You need to adjust your exposure settings by four stops.
Your exposure indicator will show you that the image will be underexposed. But, your camera does not know the object you are photographing is black, and you do. This is why you need to be in control of your exposure settings.
Similarly with the cup. The grey image the camera made when I had my exposure set to exactly what my meter was indicating looks way too dark. This is a (nearly) white cup on a white sheet of paper. This exposure does not accurately render this.
To expose the cup well I adjusted my shutter speed setting by just one stop.
Be Aware of Highlights and Shadows
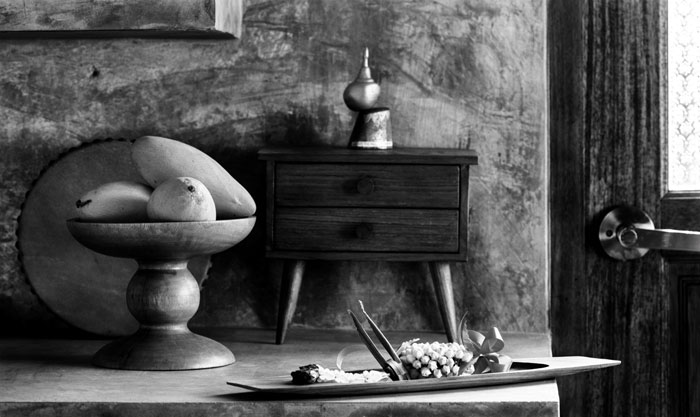
I chose to set up these photos with fairly even, soft light. There are a few soft shadows. The cup has a few areas where the light is reflecting highlights.
At times you may want to take a light reading from the highlights or shadows. This can often add more drama and feeling to photos when it’s done well.
In scenes where there’s a range of tones, shadows, and highlights, make spot meter readings from various areas.
Think about how different the extremes are.
How will the darkest areas look if you set your exposure for the highlights?
How will the lightest areas look if you set your exposure for the darkest areas?
Think About the Tone of Your Main Subject
Traditional weddings can be challenging. The bride wearing white and the groom black. It certainly wasn’t a photographer that came up with that tradition.
To render detail in both the dress and the suit in one single exposure is not possible with today’s camera technology. Generally you’ll want to expose your photos so there’s detail in the dress. Underexpose from what your camera’s meter is indicating. The bride will thank you when she can see the lace and other detailing on her dress.
Recognizing the tone value of your main subject will help you expose it well. It does take some practice, but do it regularly for a while, consistently, and it will become intuitive.

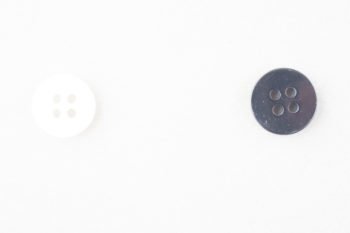
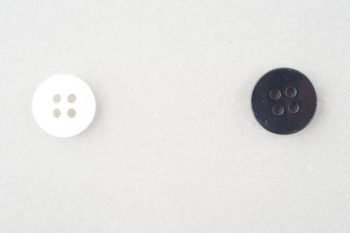
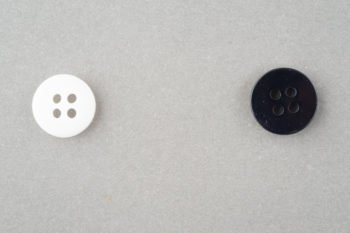
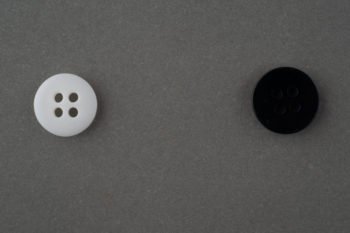
Try This Exercise
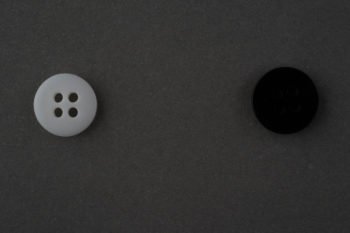
- Find a piece of card that’s middle gray.
- Place one black and one white object on the card.
- Take a spot meter reading from the card.
- Make a photo.
- Adjust your shutter speed by one stop slower and make another photo.
- Repeat the previous step three more times.
- Now adjust your shutter speed back to where it was for your first photo.
- Adjust your shutter speed by one stop faster and make another photo.
- Repeat the previous step three more times.
You will now have a series of images you can compare and take notes on. Compare how the black and white objects appear in each photo. Notice how the gray card becomes very close to pure black and very close to pure white at the extremes.
Looking at the histograms of this series of photos will also give you some insight as to what your exposure meter is ‘seeing’.