This is How I Take Photographs #6 – Master Your Exposure
Every photographer wants to master your exposure.
To master your exposure takes an awareness of light. You also must practice with your camera in manual mode to become proficient.
Light is the essence of photography. Without light, you simply cannot take a photograph. Mastering your exposure, the way the camera is set to record the light, is essential. Learning to visualize your image will guide you to master your exposure.
‘Photography’ means ‘writing with light.’ The better understanding you have of light, the more expressively you can use it. Some light is hard. Some is soft. There is direct light and reflected light. Divergent surfaces reflect light in different ways. It depends on what they are made of and their color.
Recognizing the differences in how you see light and how your camera records it means you can visualize how your photos will look and master your exposure. When you know the image you want to create you can adjust your camera settings accordingly. Understanding some advanced spot metering techniques will help you achieve the best results.
This Is Not What I Saw
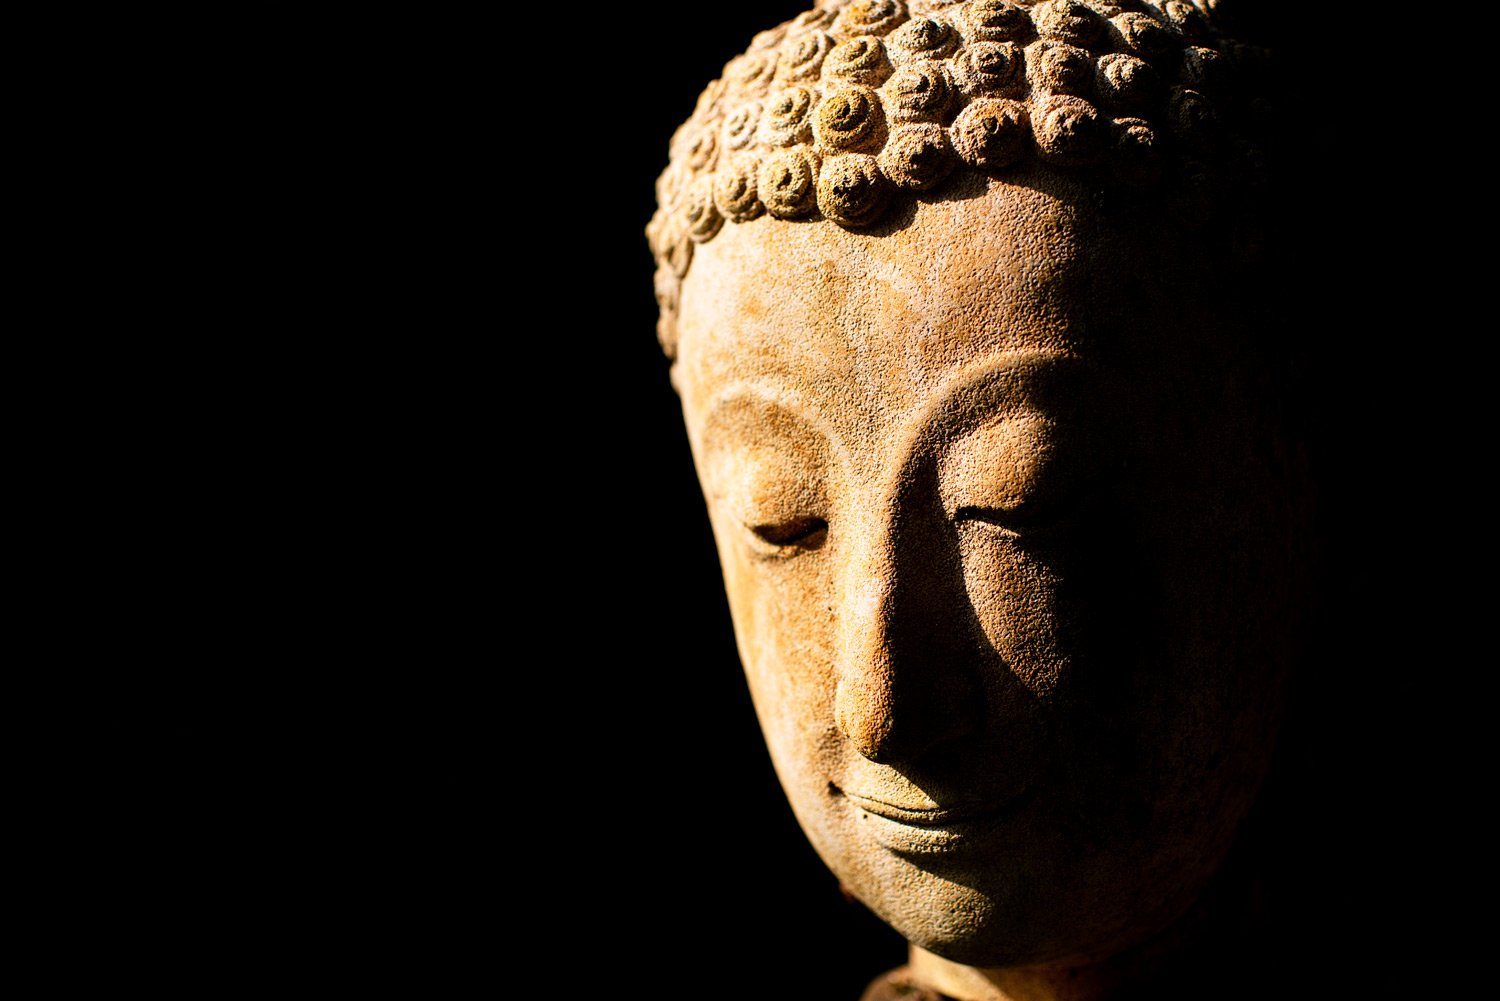
The photo at the top of this article is not the way I saw it with my eyes. I took the photo at 3 pm on an October afternoon, outdoors in bright sunshine. It is the result of visualization and careful exposure. Most of obtaining this ‘look’ happened with my camera settings.
Here’s a copy of the same image file I edited alternatively in Lightroom.
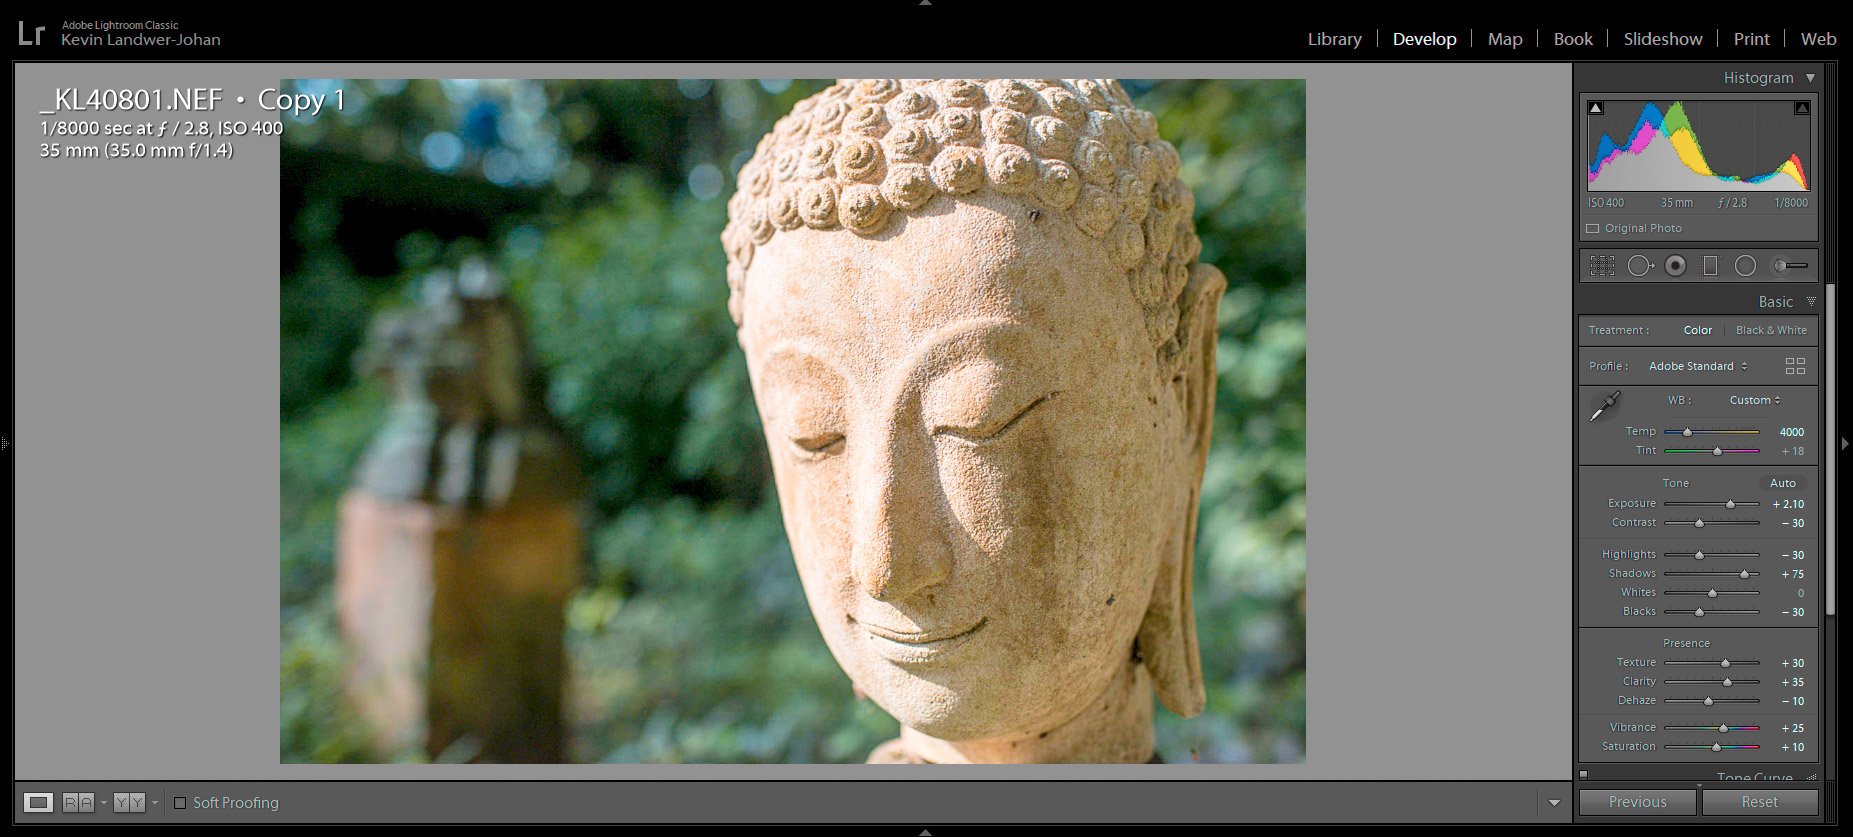
I wanted to adjust the Lightroom settings to get it as close as possible to the way I remember seeing it. There is a remarkable difference between what I saw with my eyes and the way I visualized and recorded it.
I Have Seen The Light!
Just as Jake Blues did in the famous scene from the Blues Brothers movie, I have seen the light. Okay, maybe not in quite the same way. But in more ways than one I have seen the light.
Seeing the quality of light and how it reflects off your subject will determine the exposure. Understanding when the light on the background is different will also impact your decisions and help you master your exposure.
In this situation, I saw the potential to create a high contrast photo. I wanted the highlight areas to stand out and the areas in the shadows to be as dark as possible. Because direct sunshine was hitting only part of the statue I was successful. The lack of bright sunshine on the background also helped.
What Your Camera Sees
Your camera can ‘see’ whatever you point it at. What it records can be radically different than what you are seeing with your eyes. Cameras are still limited in the range of tone they record in a single exposure. This varies between camera makes and models depending on the quality of the sensor. The firmware in the camera also has an effect on the way it captures images.
Our eyes are not limited to one ISO setting as our cameras are for each exposure. We are also able to see a broader tonal range than our cameras are capable of. This is changing as technology develops. In the future cameras will most likely be capable of recording a wider tone range than is visible to the human eye.
If you’ve been taking photos for a long time and upgraded your camera, you will appreciate the improvements. Even more so if you used to use film before digital cameras were invented.
Many improvements have been made to sensors. Now they are able to record more tones in a single exposure. The ongoing development of image processing software is also significant. We can now better manipulate our photos after we have taken them.
Master Your Exposure for Better RAW Files
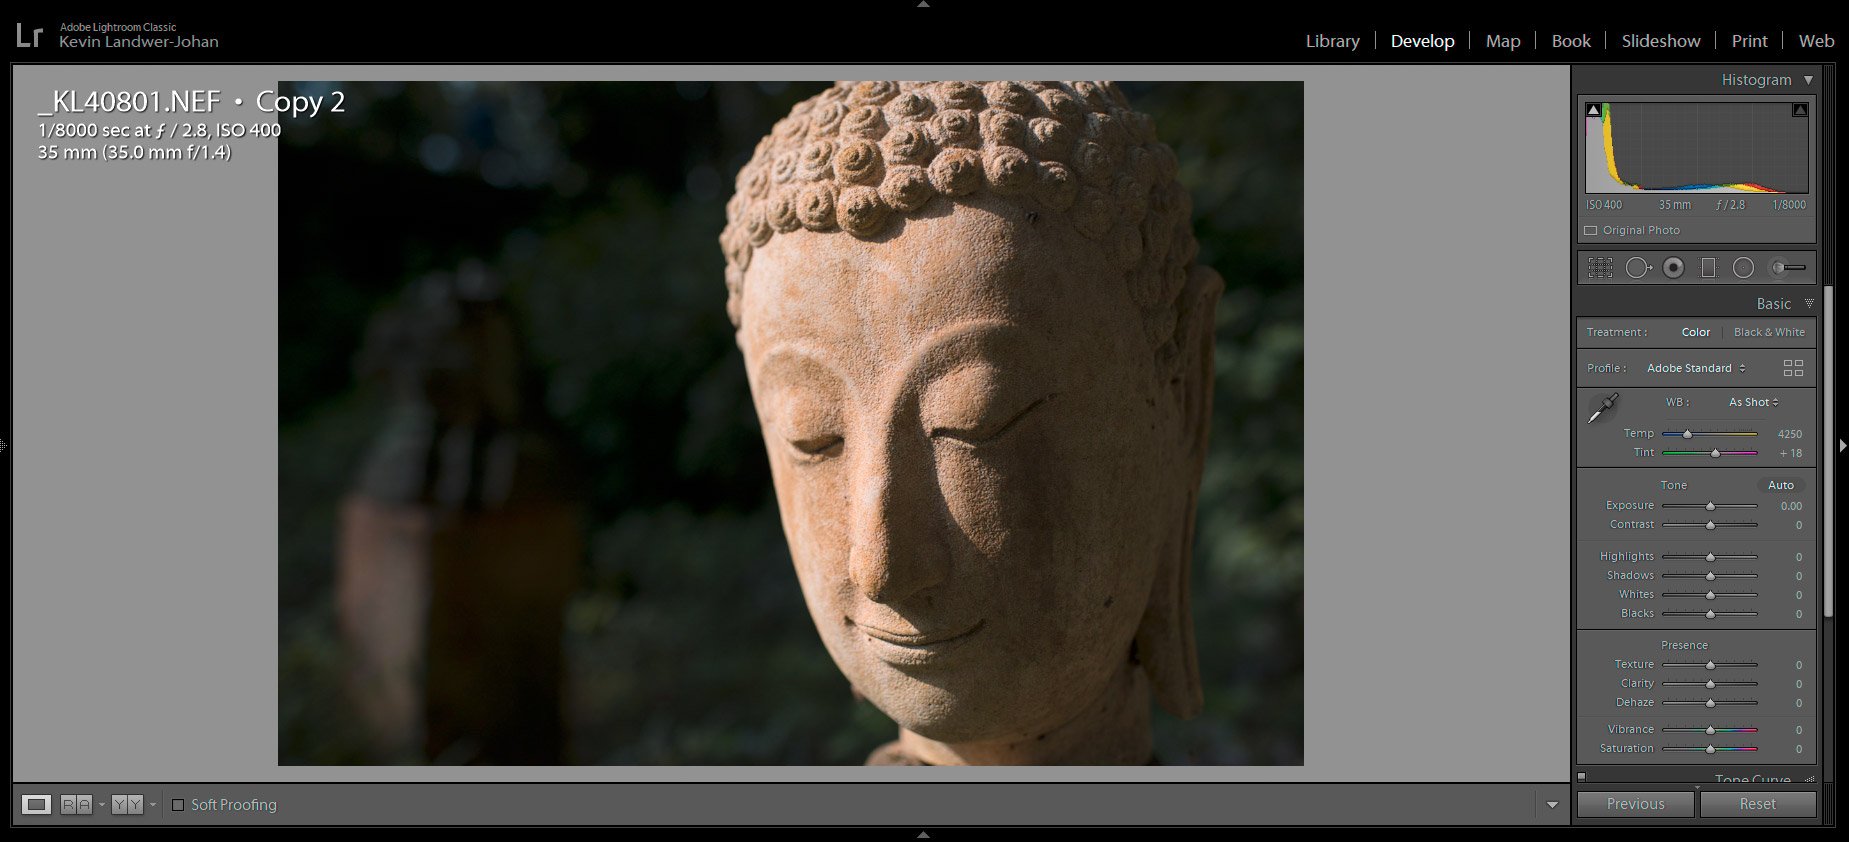
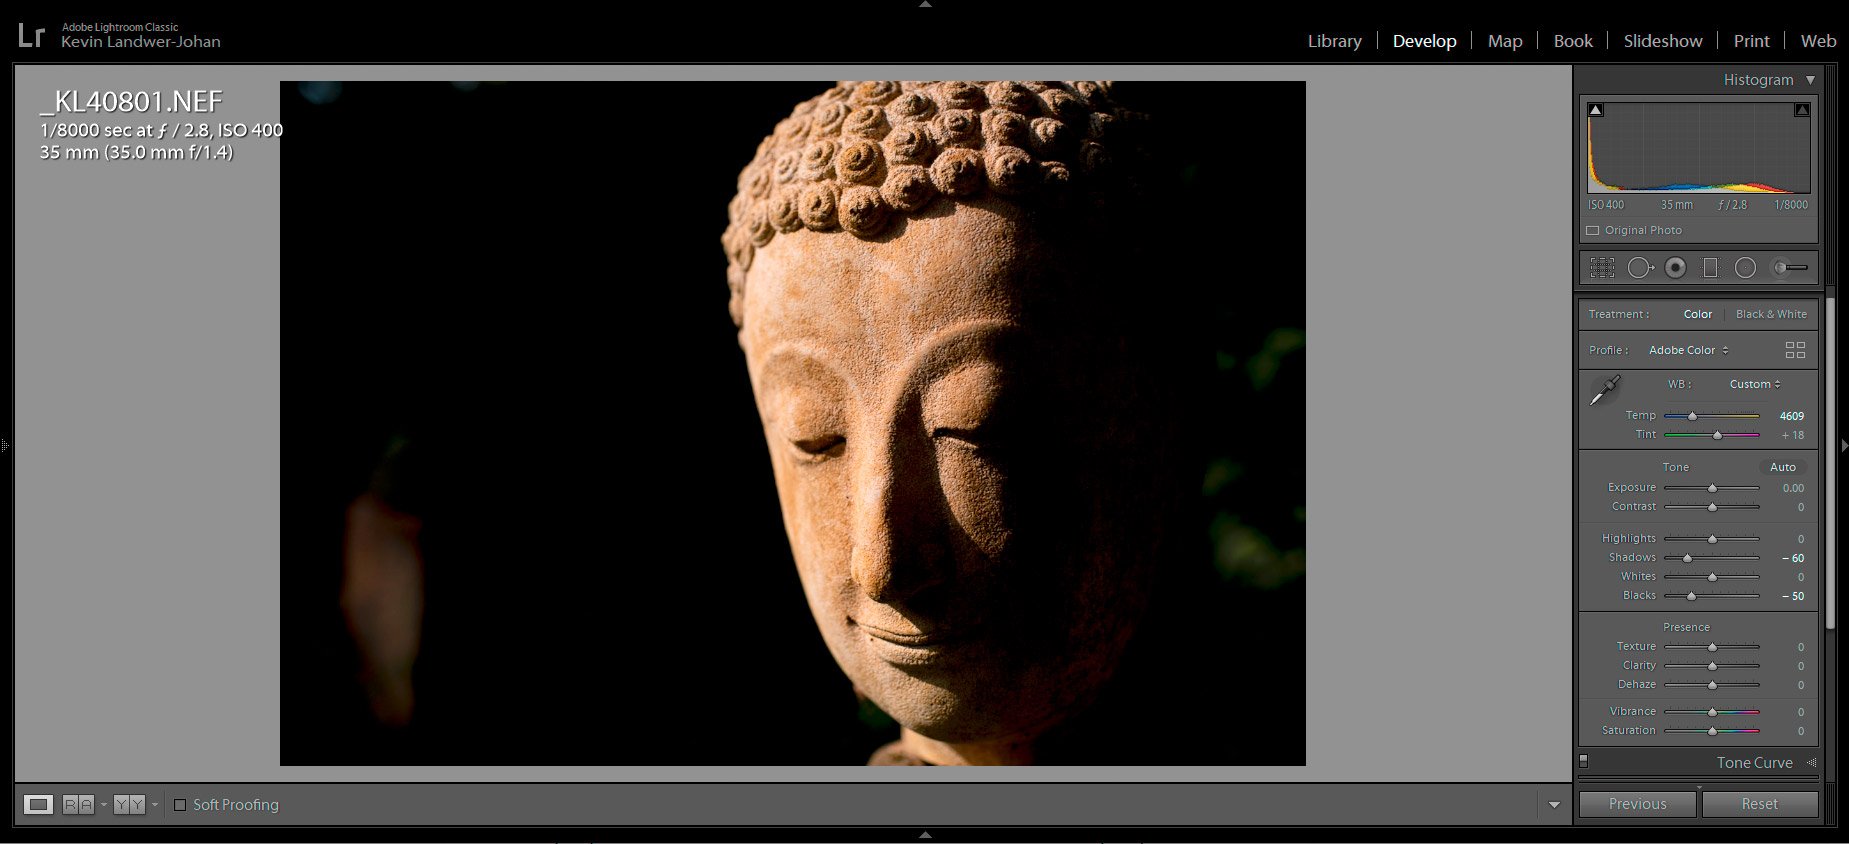
Above is another copy of the original photo I made. It is a RAW file so it contains all the data my camera recorded. Look at the panel on the right of the photo. You’ll see that I have not made any post-processing adjustments to this version.
The histogram at the top or the panel shows a column of data is in the ‘black’ regions of the image. This is to the left of the ‘shadows’ region of the histogram. Looking at this information confirms that I will be able to darken much of the image to obtain the look I want. You will also notice there is no spike to the right of the histogram. This means that none of the data is lost to overexposure.
I was not concerned about losing detail in the shadow areas, because there is nothing there I want to see. Making sure I did not overexpose the brightest part of my composition was more important to me.
Light Metering Techniques to Master Your Exposure
I use my camera in manual mode pretty much all the time. It was how I was brought up. It’s kind of like having good manners. If you’re brought up being polite and respectful, it’s easy for you to choose when and how you apply manners. If you learn manual mode you can choose how and when to make the exposure settings you want.
I wanted to expose the photo of the statue so the sunny portion of the face was well exposed. I knew if I did this the parts of my composition which were in the shade could be rendered as black.
To achieve the exposure I wanted I used my spot meter setting. I took a light reading from the forehead of the statue. I then slightly underexposed it so the texture on the white stone would be more evident.
If I had my camera set to an automatic mode and used averaged metering the result would be quite different. The RAW file may have looked more like this.
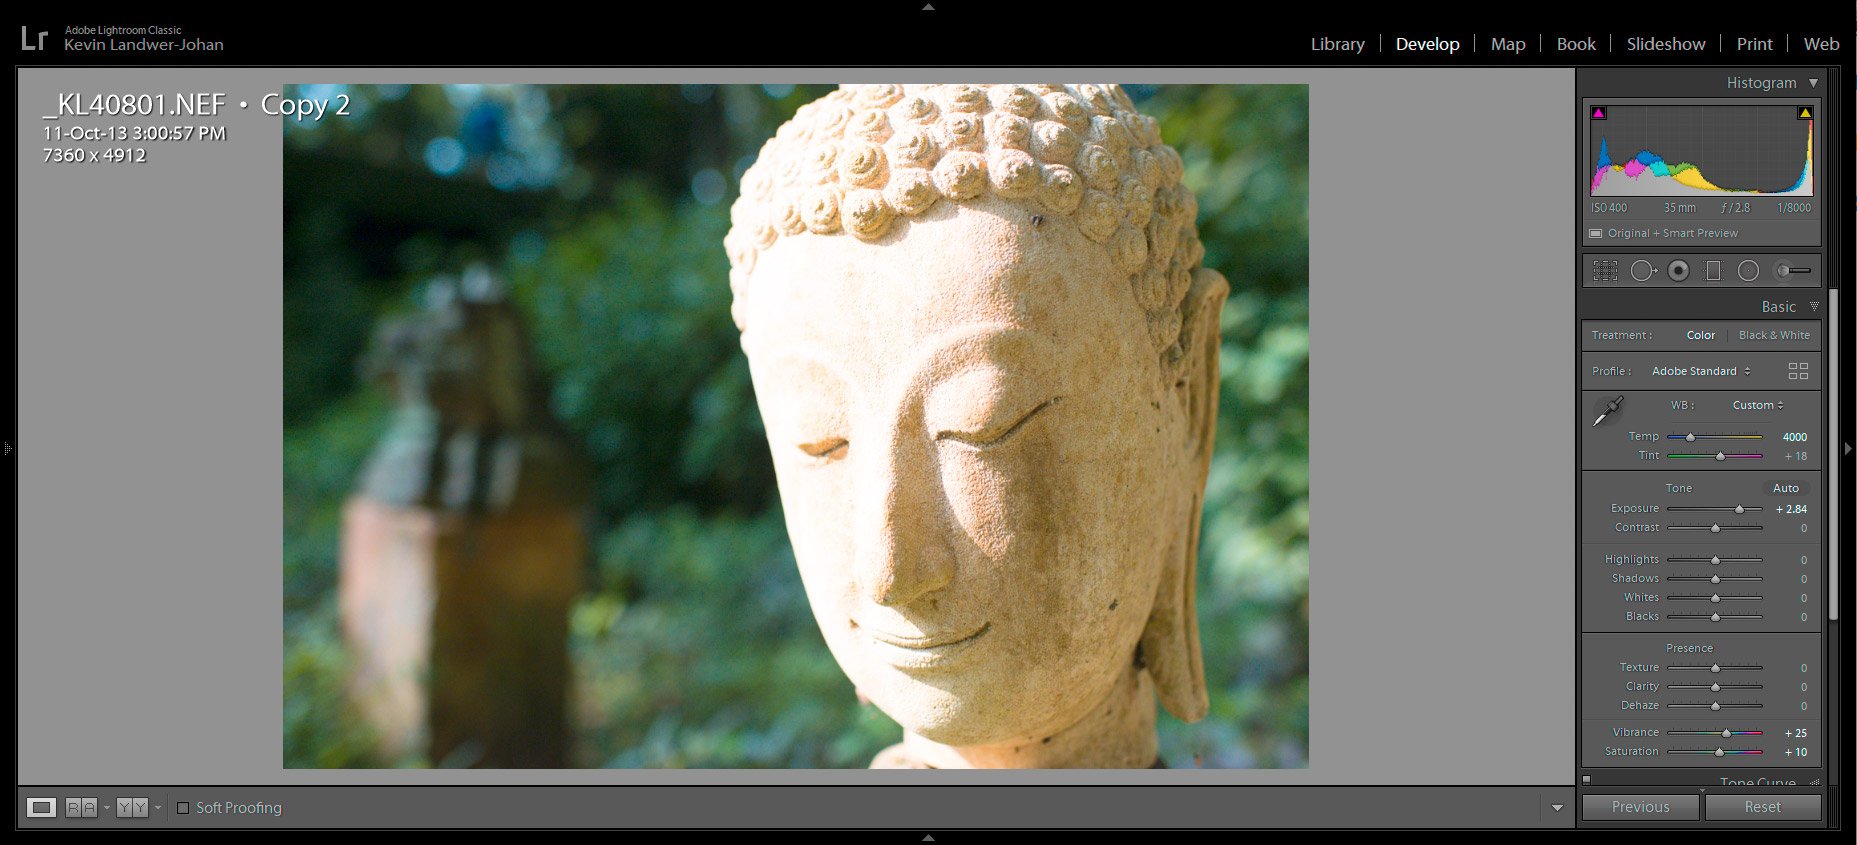
The camera would have tried to average out the shadow and highlight areas. It would want to render as much detail as possible. This then risks seriously overexposing the highlight area. For this composition, the highlight area is my center of attention.
Precise and Accurate Exposures
I am aware that using exposure compensation in auto modes can help alter the standardized exposure the camera will make. I find I can be more precise and accurate using manual mode rather than compensation.
Using this spot metering technique it’s possible to isolate the part of the image you decide is important to expose well. Spot metering for highlights allows you to dial in the exposure settings which fit the photo you have visualized.
Using advanced spot metering techniques you can read the light from various sections of your composition. This will show you the light values in relation to one another. You’ll be able to understand when a ratio has sufficient contrast to make this style of photograph.
This spot metering technique lead me to make these settings:
- Nikon D800 at ISO400
- Shutter speed at 1/8000th of a second
- 35 mm f/1.4 lens at f/2.8
Using such a wide aperture setting was not necessary for the exposure. I could have used a slower shutter speed and narrow aperture setting for the same exposure. With my aperture at f/2.8 it did ensure the background was blurred. Even though you can’t see it in the finished photo it made it easy to post-process the dark background.
Here are the various renderings of the image again so you can compare them:
What Is The Best Metering Mode For Portraits?
This is a question I hear and read often. The best metering mode for portraits for me is a combination of two. I will use both averaged and spot metering to discover my exposure.
First I have my camera set to averaged metering. This is my default. I have the function button on the front of my D800 assigned to activate the spot meter. This makes it quick and easy to use both averaged and spot metering.
Using this photography metering technique I am able to make a reading of my whole composition. Once I have this information and have dialed in my settings, I take a reading from the face of my subject. This is the most crucial part of the portrait.
At times when the background is much brighter or darker than the face of my subject I will make my spot meter reading first. Then I will make and averaged reading and possible spot meter from the background as well.
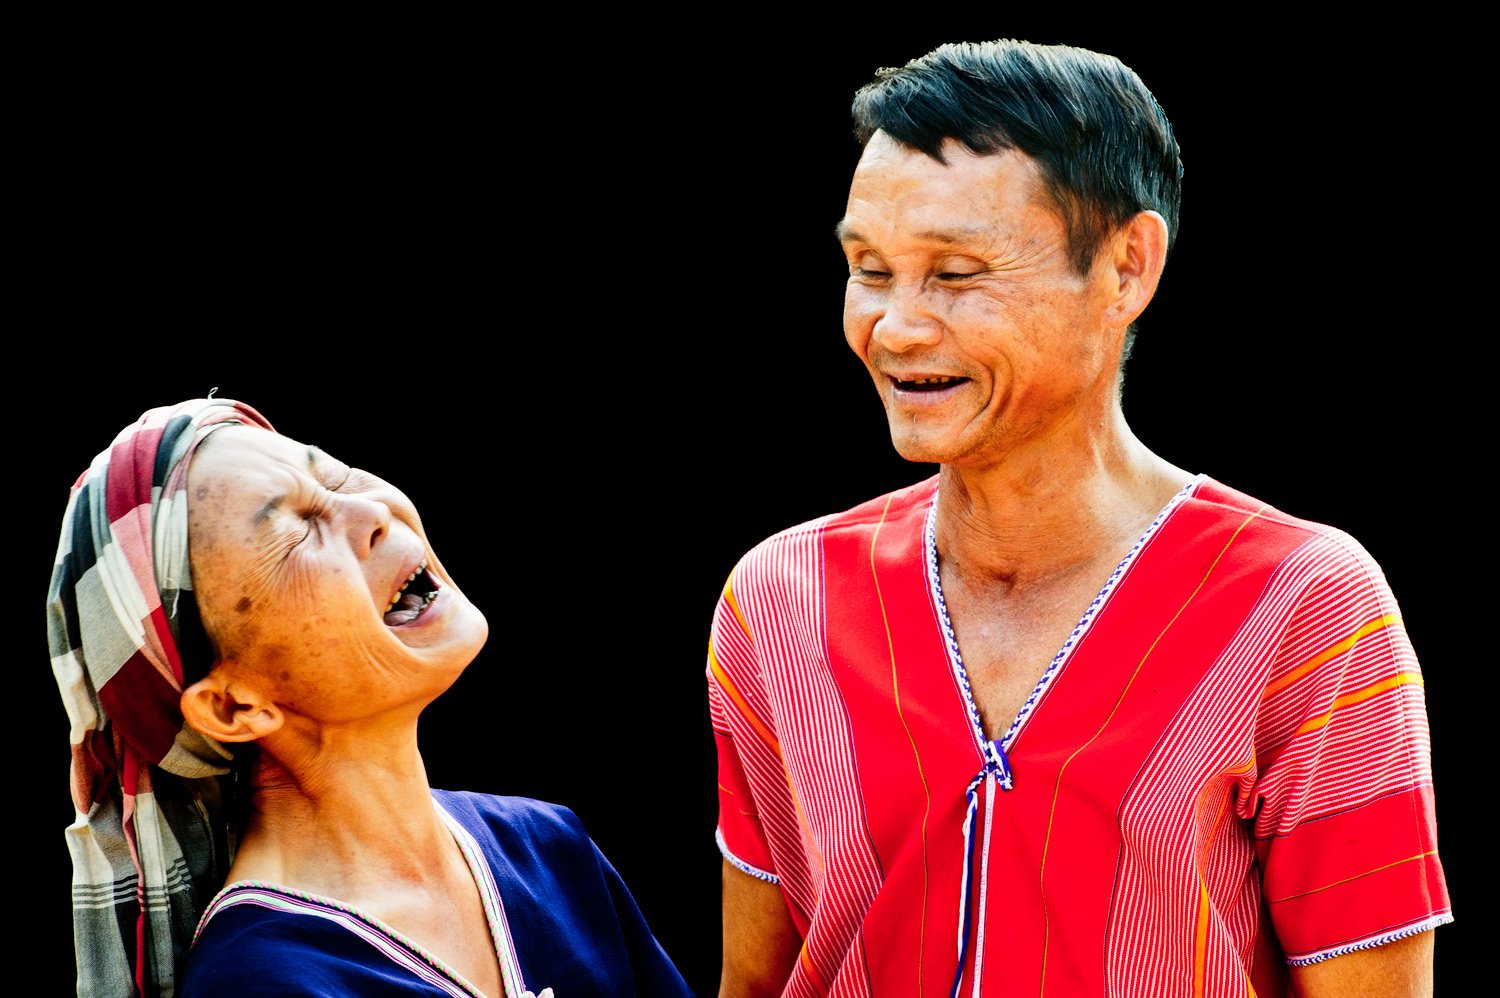
If you’re photographing someone in bright sunshine, as I did with the statue, you might want to spot meter for the highlights. This way you will avoid losing detail in the bright areas of the image. You can also take a spot meter reading from the shaded part your subject’s face. This will leave the bright part of their face overexposed.
The mood of your photos will be largely affected by the metering and exposure choices you make.
What Subjects Are Best To Spot Meter For Highlights?
You can use this spot metering technique with any subject, but it works better with some than others.
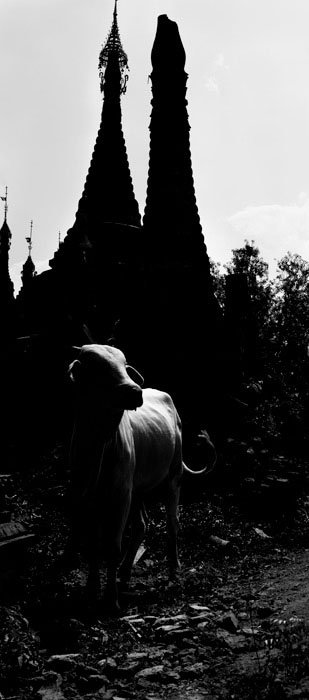
Strong subject with clean lines and not much detail can look fabulous. At times so can compositions with a lot of details. Consider each subject on it’s own and make your choice. If in doubt, take a whole series of photos at various settings. You will end up with at least one which is worth working on later.
Look at the shape the hard edges of the shadow will make in your composition. Does this make a more interesting photo?
Here’s a tip to help you decide if a subject will look okay with this light metering technique. Squint your eyes when you look at it. This will help you see which areas will go dark and where the highlights are.
Background Is Important To Consider Using These Light Metering Techniques
Paying attention to the light values in the background is important. When taking my Buddha statue photo I positioned myself and composed carefully. I wanted to avoid seeing bright areas in the background. This was challenging at 3 pm on a sunny day with tall trees blocking most of the direct sunlight, but not all of it.
There were still a few small patches of background which were lighter. I used the burn tool in Photoshop to darken these. There are various methods in Photoshop and Lightroom to darken specific parts of a photo. If I’d stood in a slightly different place I would have seen a lot more bright patches in the background. I found an angle where the statue looked good and there was minimal light on the background. I prefer photographing like this to avoid lots of post processing.

Teaching Spot Metering Technique and Manual Mode
During our photography workshops, I use this one photo more than any other to illustrate spot metering techniques. I also emphasize the use of manual mode and the choice you have to be creative with your camera and master your exposure.
The more you understand how your camera works the more creative you can be with it. Your camera is smart. It will make an ‘acceptable’ exposure in any auto mode a lot of the time. Your camera will never make a creative decision. It is not capable of it. That’s your job.
Unless you understand your camera and know how to adjust it your photos will be exposed just like everyone else who uses an auto mode. It does take practice and time to learn to use manual mode. I have made it easy to learn online about how it’s done with my “Master Your Camera – Master Your Creativity” course. During this course, I will teach you and guide you through learning to use manual mode. I’ll give you more insight into why and also show you that it’s not nearly as complicated as some people make it out to be.
I also teach like this during our Chiang Mai and Suan Sook Photo Workshops and Retreats. Learning advanced spot metering techniques gives you the freedom to be more creative with your camera and master your exposure more often.