Q: What’s the easiest way to learn manual mode on your camera?
A: By using your camera’s monitor to determine when you have the best exposure.
Many people think it is too difficult to learn manual mode. It’s not. In fact, now it’s even easier than ever.
Modern cameras come filled to the brim with awesome, smart technology. You really don’t need to use much of it to take great photos. Focusing on learning manual mode can actually simplify the process. It will enhance your experience in becoming a more competent photographer.
Learn Manual Mode – Be In Control Of Your Camera
Your camera’s monitor is the most convenient guide to setting a good exposure manually. Not all cameras are set up to do this. In my previous article in this series, I outlined a method of how to ascertain if your camera is. This is about the easiest way to learn manual mode.
If you have worked through these steps and learned that your monitor will not show what you need it to, please skip to the next article in this series.
Having seen that your camera’s monitor will assist you in making correct exposures effortlessly, get ready to learn something cool.
The Easiest Way To Learn Manual Mode On Your Camera
With your camera set to Manual, opening Live View allows you to see what your exposure will look like when you take a photo. This is easier to use than the more traditional method of using the viewfinder exposure meter read out.
Photographers, by nature, are visual people. It makes sense that when you are learning to work with your camera in manual mode, that you would want to use Live View so you can see what’s happening.
Adjusting the shutter speed, aperture, and ISO, the three components of the exposure triangle, is easy when you can see the effect it will have on your exposure.
Learn To Read The Light
Using Live View you can see what parts of your composition are best exposed, where it’s dark and where it’s bright.
Look at how the light falls on your subject and consider if it looks as real as when you are looking at your subject directly, not on your monitor. Is it too light or too dark? If so, change your exposure settings.
Experiment if you are not sure. In high contrast situations, your camera will not record an even exposure over every part of your composition. You will have to choose whether to expose the highlights, shadows or mid-tones best. Try different settings and watch what happens on your monitor.
As you choose a slower shutter speed or wider aperture, more light will affect your image. The shadow areas will become lighter and so will the highlights.
Alternatively, choose a faster shutter speed or smaller aperture to allow less light into your camera and create a darker image.
I don’t change my ISO setting often. Generally only when the light changes dramatically. For a more detailed explanation of how to use your ISO please take a look at this video.
Decide What’s Most Important
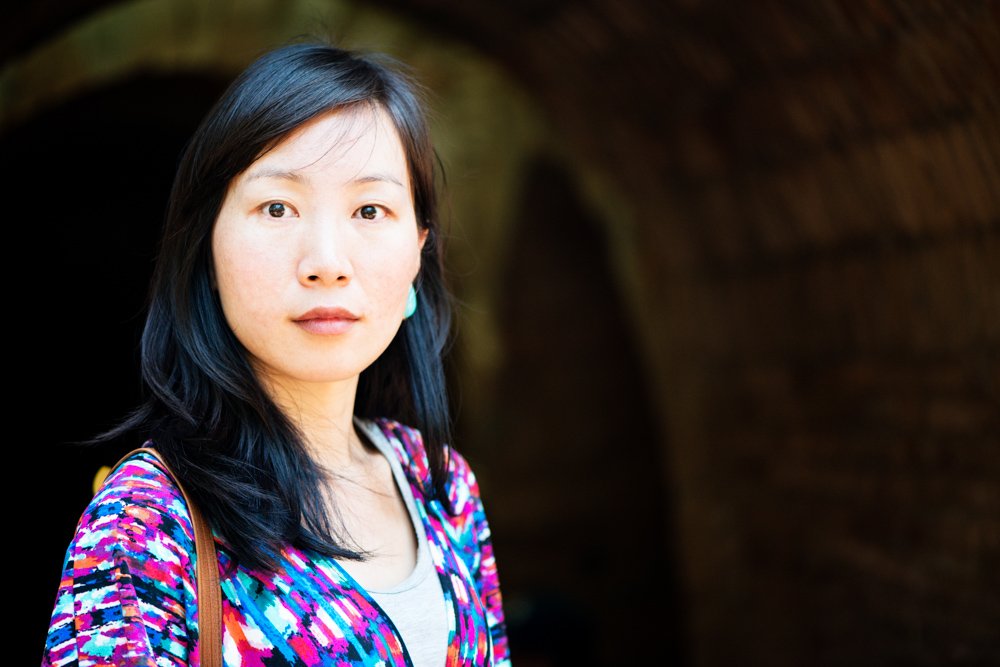
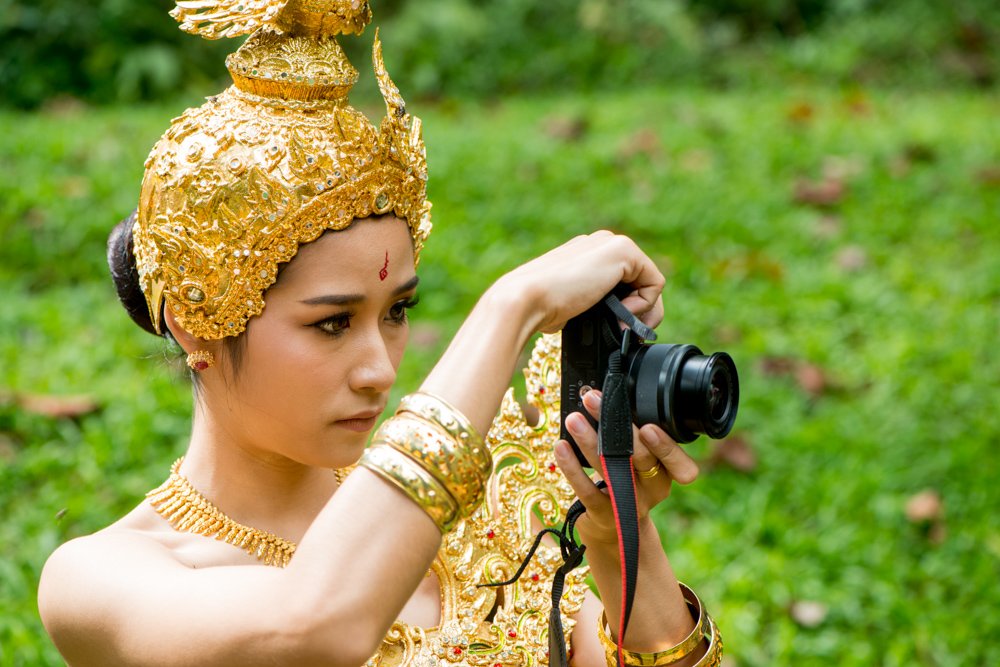
Most importantly, decide what the primary part of your composition is. Expose that part the best. If it’s a bright area, like the woman’s face in this portrait, then the background will be dark and your camera may not record all the details in those areas.
If you choose to expose a dark area of your composition well then the brighter parts of your composition will be overexposed.
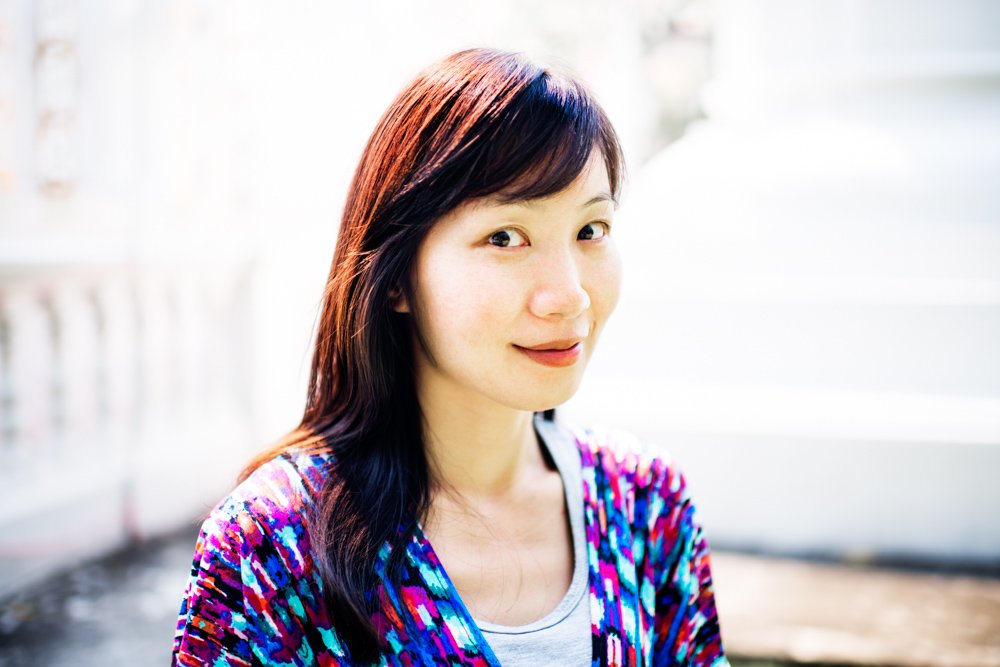
Here I have used a photo of the same woman in a different location. Her skin tone has not changed, but the amount of light in the background has. In the first example, her skin tone is lighter than her surroundings. In the second example, her skin is darker than the background.
Making your exposure adjustments while looking at your monitor you would be able to see this difference. Using the exposure meter readout while looking through your viewfinder it may be more difficult to perceive this.
Use The Highlight Indicator Function
Most cameras have a function to show what parts of an image are overexposed. This may not show up in Live View, but it can be seen when reviewing your images. It’s also known as the ‘blinkies’ because overexposed parts of the composition will flash dark and bright.
With this feature turned on you can easily see where you will lose detail in the highlights of your photo.
Three Negatives of Using the Live View Exposure Technique
Making such frequent use of your monitor drains your battery faster. On cameras, with no viewfinder, it doesn’t make any difference as you need the viewfinder on to compose your photos.
When the light conditions are very bright it can be difficult to clearly see your monitor. With lots of light reflecting around making a good choice of exposure can be challenging.
Pro Tip
Wear black. If you wear black or a dark color it’s easier to view your camera’s monitor because it’s reflecting your shirt when you look at it. Wearing light colors or shirts with light-colored prints can hinder your ability to see your monitor clearly.
Using this Live View technique is slower, particularly if you’re using a DSLR camera. Once you press the shutter release to take your photo the monitor turns off and the mirror in the camera drops down before the picture is made. Then it has to reset and turn Live View on again.
Give the Live View Technique a Try
If you are new to photography or have been stuck using the auto modes for a while, give Live View exposure a try. You will be surprised how easy it is because it’s so visual.
Once you have gained some experience with it and have a better idea of how manual mode works, you can progress on to learning to read the exposure meter. This will help preserve your battery life and speed up your picture taking.
Take a look at this video for a brief, more visual explanation of this technique.