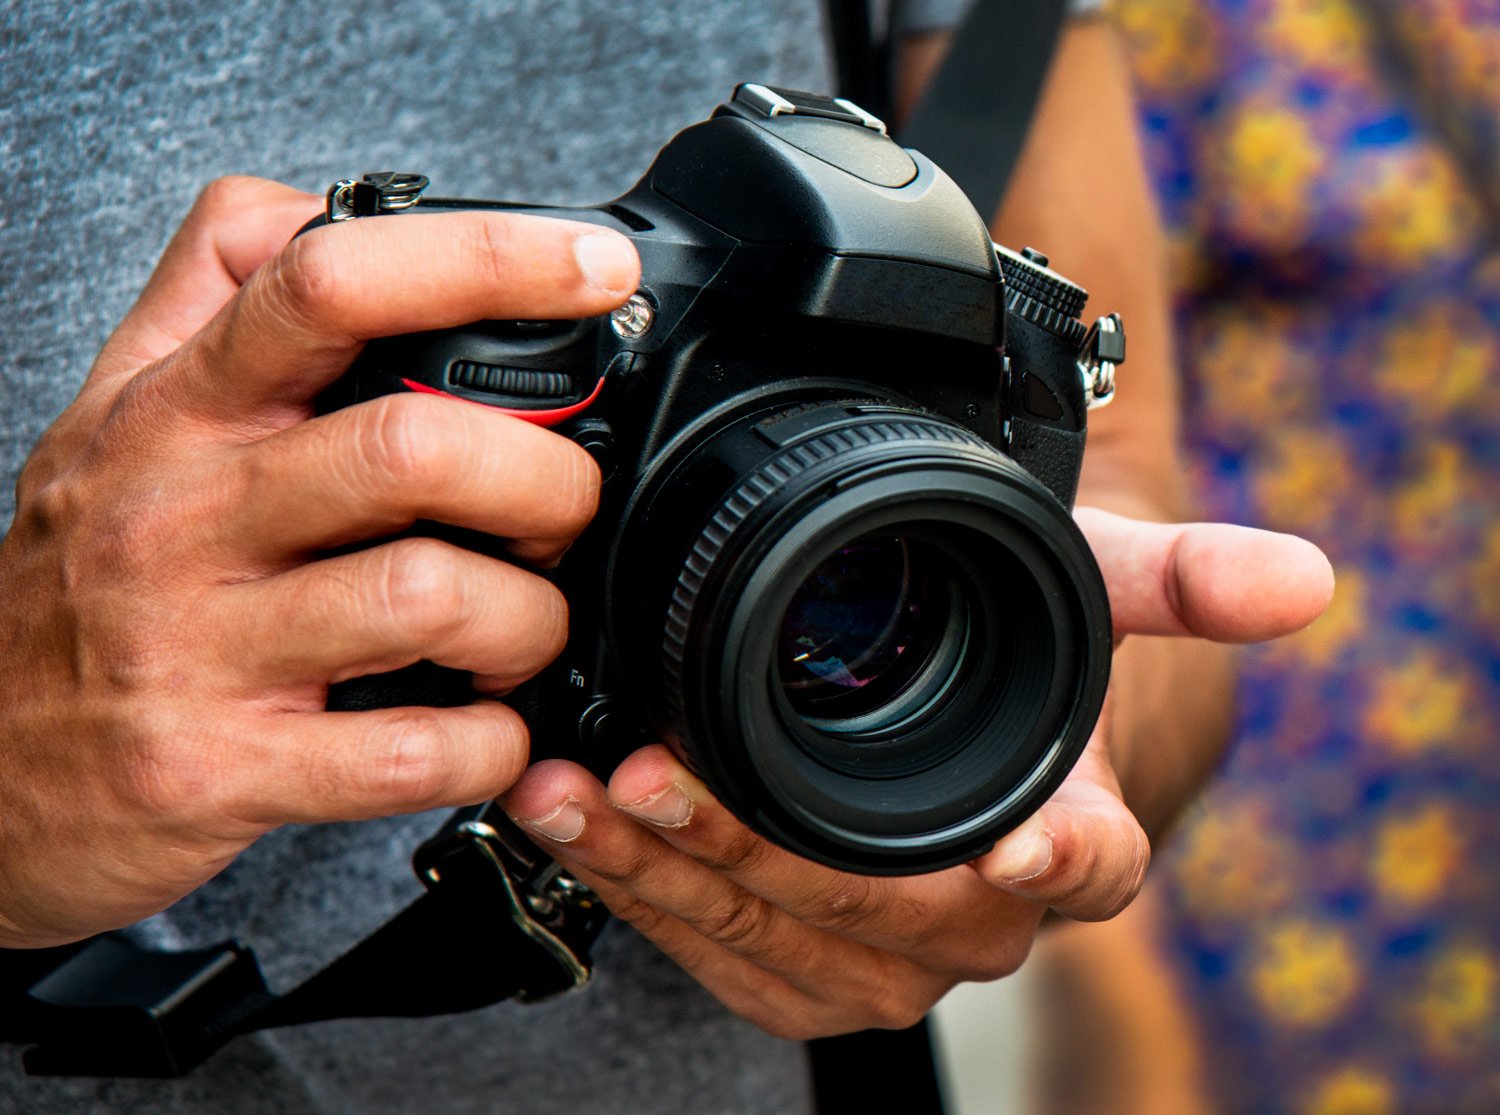
DSLR and mirrorless cameras are more complicated than ever. How to set up a new camera so you get the best photography experience is an important first step. But many people stumble and end up crawling along and hindering their progress.
In this article, I’ll take you through the most important settings you need to configure on your new camera. It does not matter if you have a Nikon, Canon, Sony, or any other brand. These settings are essential and universal. They are the most important camera settings you need to adjust on your new camera. If you have a DSLR camera or a mirrorless camera, what I outline here about camera setup applies.
I’ve made three lists of adjustments when you first set up your camera. In the first list are the most important controls you need to be aware of and adjust. The second list is also important but can be left until a little later. Once you have more experience with your camera making the adjustments recommended on the second list will make more sense. Last, in the third list, I introduce some other helpful tips for new photographers on how to get the most from your camera.
This article will address the main controls that are common on cameras. Each brand has its own names for some of the controls, so I use generic terms for them. There are so many small differences between brands I cannot possibly address them all. This article takes you through the essential camera controls that are common to most cameras.
List One
Here are the main items I’ll address:
- Adjusting the diopter
- Setting the menu language
- File formats
- Battery and memory cards
- Focus modes and options
- Exposure modes
- ISO
- White Balance
- Zoom lens control
List Two
Here are other adjustments you can make before you start, or you can wait until you are more used to using your camera.
- Color space
- Exposure compensation
- Burst or single
- Flash controls
- Metering mode
- Monitor Settings.
- Dual card file writing
- Time and date
- Image stabilization
- Changing Lenses
List Three
Last is the third list of less essential items that will be helpful to new camera users.
- Transferring images
- EXIF info viewing
- Self-timer
- Using a flip-out monitor
- Zebra pattern
- Monitor grid view
- Filter Settings
- WiFi and Bluetooth
- Custom settings
- Back button focus
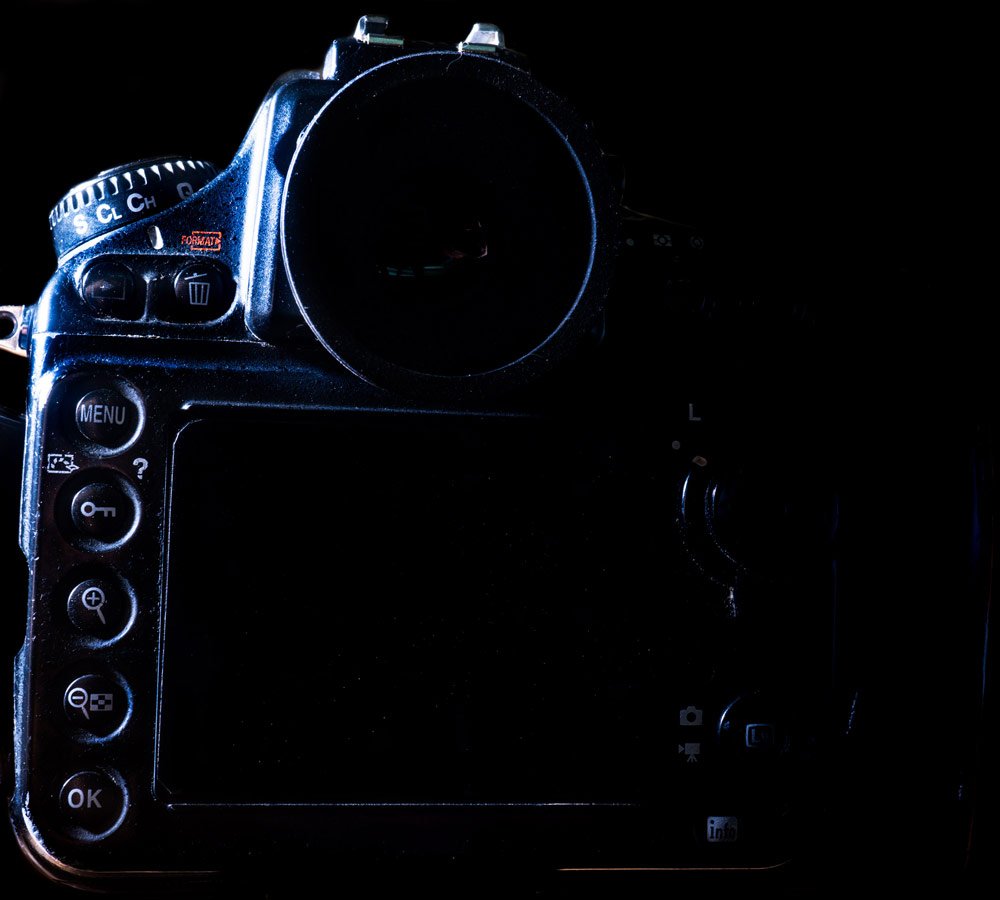
The Viewfinder and Monitor on Your New Camera
Most of the time you’re using a digital camera you’ll have your eye to the viewfinder or be looking at the monitor. Which one you use as you take photographs is up to you, unless you’re using a mirrorless model that has no viewfinder. Then you have no option.
Reading and understanding the most important information you see will help you take better photos. At first, this may all seem to be too much information. Take your time to learn what it’s there for and it will not be a distraction once you’ve been taking photos for a while.
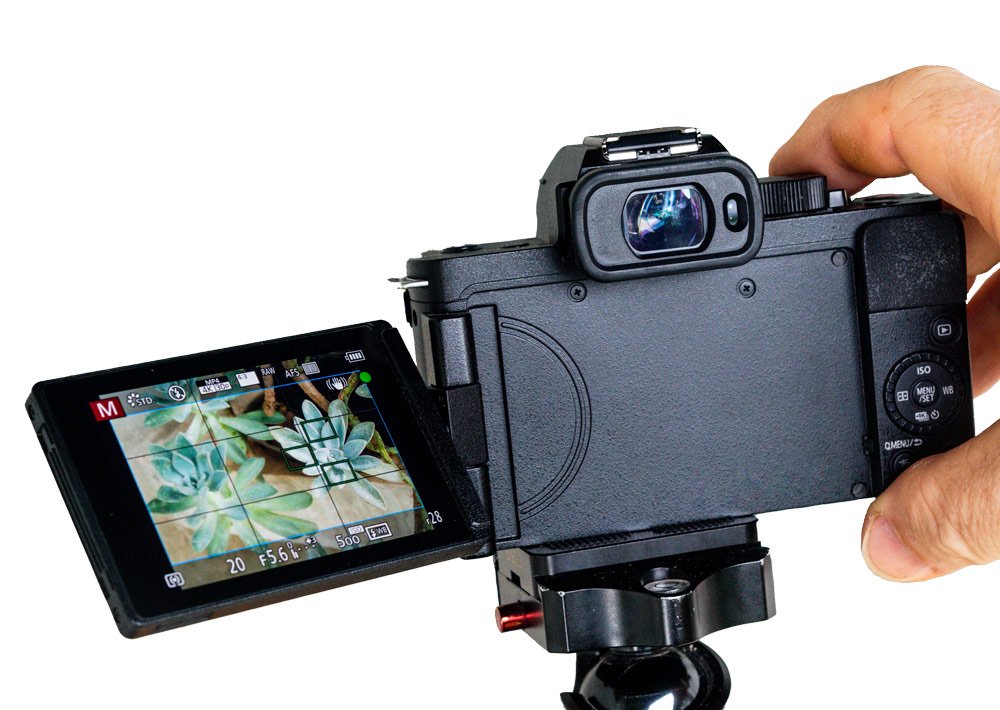
The amount of information displayed on your monitor can be controlled. There will be an ‘info’ or ‘display’ button that configures how much data is presented when you are taking photos. On some cameras, this can also be controlled with a dial or rocker. If you find the information distracting, you can turn it off. But the information is provided for good reasons. It can help you take better pictures.
Mirrorless cameras have electronic viewfinders. These are basically tiny monitors inside the viewfinder. On many cameras, the amount of information displayed on the electronic viewfinder can also be controlled. You may notice that as you put your eye to the viewfinder the monitor will automatically turn off.
The most important information about exposure is typically displayed under the image area. The lines and shapes overlaying the image are for focus control. The icons on either side and above the image are for the myriad of other controls outlined in this article.
Essential Controls to Set Up a New Camera
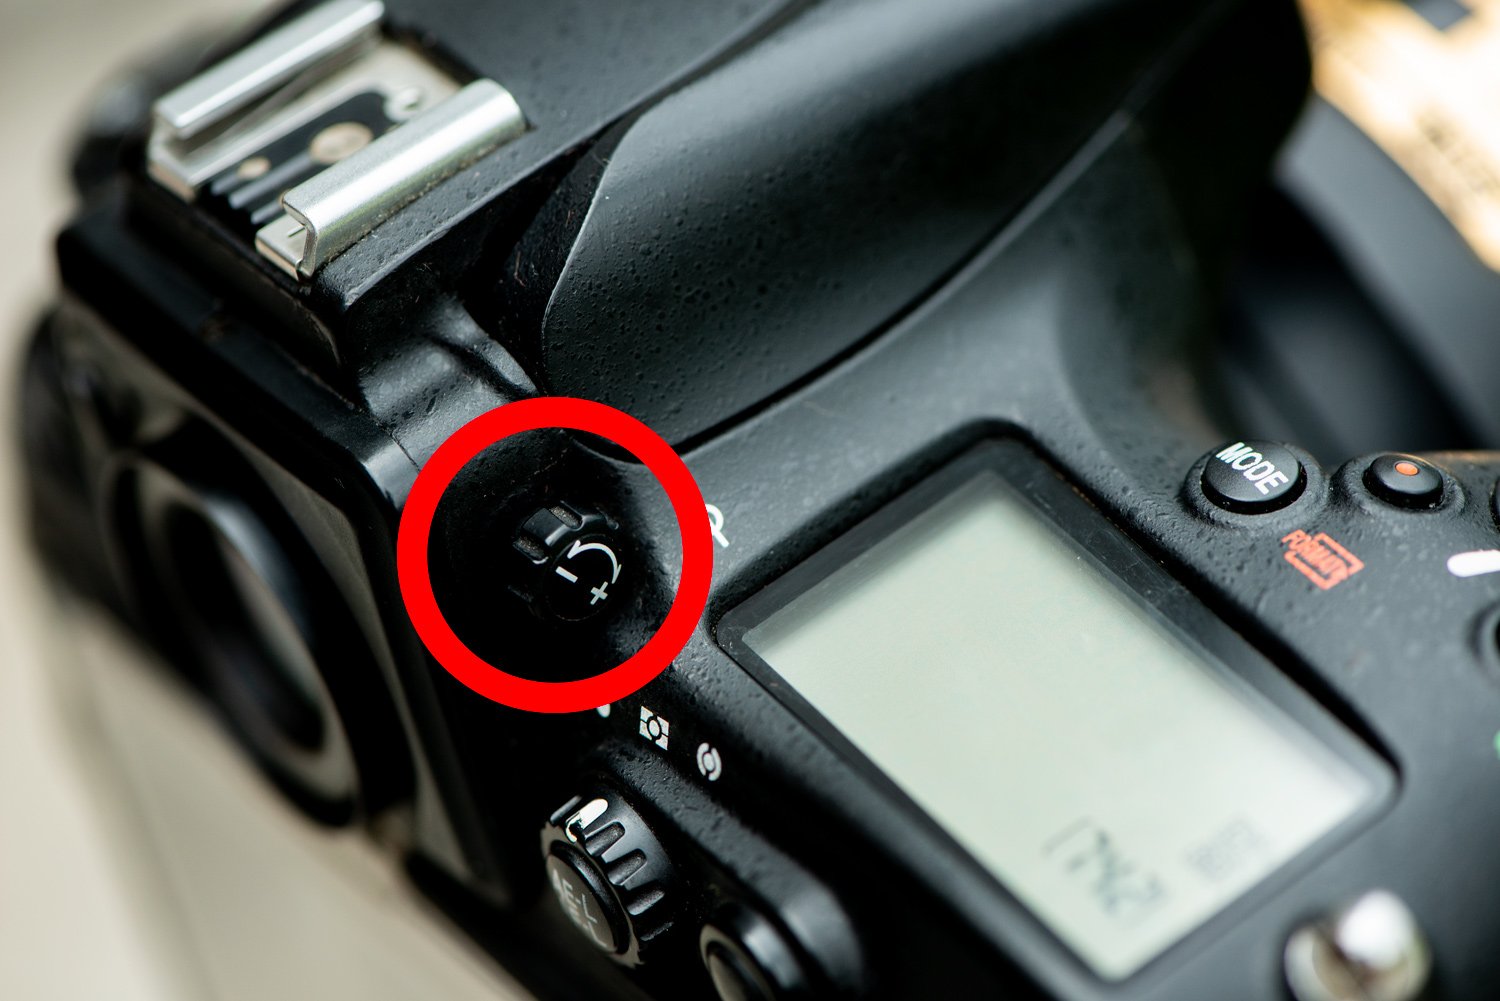
1 – Adjusting the Diopter
The diopter is a small lens in the camera’s viewfinder. It allows you to match the focus of your viewfinder to your eye. If you are using a camera that’s had the diopter adjusted so it doesn’t match your vision, you will see a blurry image in the viewfinder. You will need to adjust the diopter to correct this so you can see a sharp image.
The diopter adjustment control is a wheel or slider close to the viewfinder. Most diopter controls are labeled with + and -. As you look through the viewfinder turn the diopter adjustment until the data you see is sharp. Doing this with your lens cap on may help.
My wife and I both use Nikon D800s. If she’s been using my camera, I know. The image is blurry when I look through the viewfinder. She is nearsighted and I am farsighted, so the diopters on our cameras are adjusted differently.
2. Setting the Menu Language
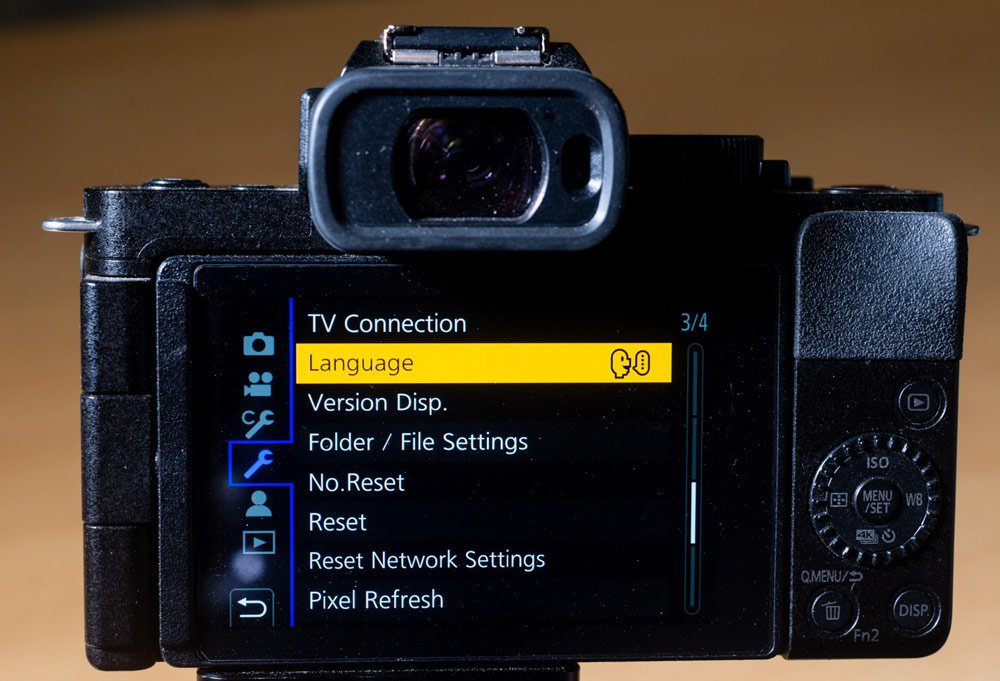
Good sales staff will check the menu language on a camera they sell you will be right for you. However, if they forget or if you’ve purchased your camera online, you’ll need to set it. Looking at a menu system in a language you can’t read is confusing. Thankfully there’s usually an icon that looks like a person speaking or a speech bubble that will indicate where you can change the language.
As you look at the camera monitor, press the menu button and look for the wrench/spanner icon. Select this and then scroll through until you can see where to change the language. This is often one of the first items in the manual that came with your camera. If you don’t have the manual you can usually download it.
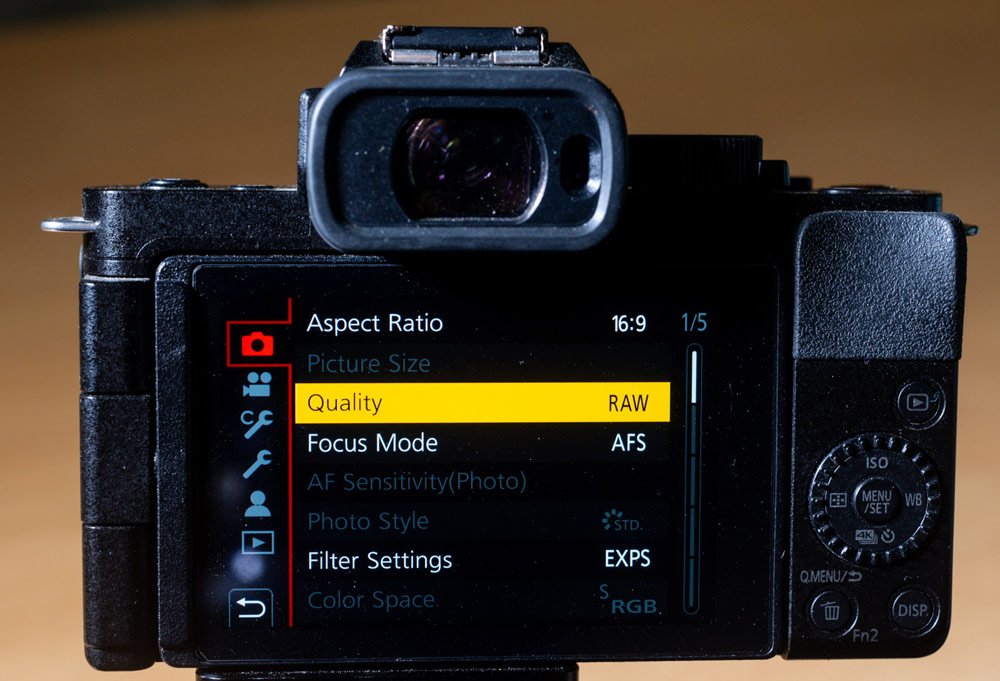
3. Set the Image File Formats
When you take a photo the camera will save the image file to a memory card. There are a few options for the file types you can save. The two most common ones are RAW and jpeg (or jpg).
Basically, RAW files contain all the information the camera records as you take a photo. A jpeg file is the same image, but the camera compresses it and discards some of the image data. This makes for smaller file sizes but lower resolution images. You can read more about the differences between file types here.
You usually have the option of saving both file types simultaneously. This takes up more space on your cards and can slow the camera down if you are taking photos in quick succession. It does give you the advantage of being able to choose to edit your RAW files or use the jpegs without editing them.
4. Battery and Memory Cards
New cameras often come with a battery that’s not fully charged. You’ll need to give it a good long charge before heading out to take photos. Maybe by now you’ve set the language and image file format and find that the camera has switched off. The battery didn’t hold enough charge. Place it in the charger, plug it in and leave it for a good few hours. Your camera manual should tell you how long the optimum charging time is.
The smaller the battery, the shorter the time it takes to charge and to drain. Mirrorless and other small cameras often have smaller batteries than larger DSLR cameras
Your camera will have one or two slots for memory cards. If you have two slots you can configure your camera to save different files to each card. Read more about this in #16.
Cameras often allow you to take photos with no memory card. The images are temporarily stored in the camera buffer and you may not be able to download them. When no card is inserted some cameras will flash a warning when you turn them on.
To avoid problems you can set the camera to not take photos unless there’s a memory card in it. You’ll need to search your menus to adjust this setting.
5. Focus Modes and Options
The main focus option is between autofocus and manual focus. It’s best to start with autofocus and it’s important to set it up well. If the autofocus on your camera is not set up well you’ll wonder why so many of your photos are not sharp.
When you partly depress the shutter button the autofocus engages. There are two main autofocus options. AF-S and AF-C.
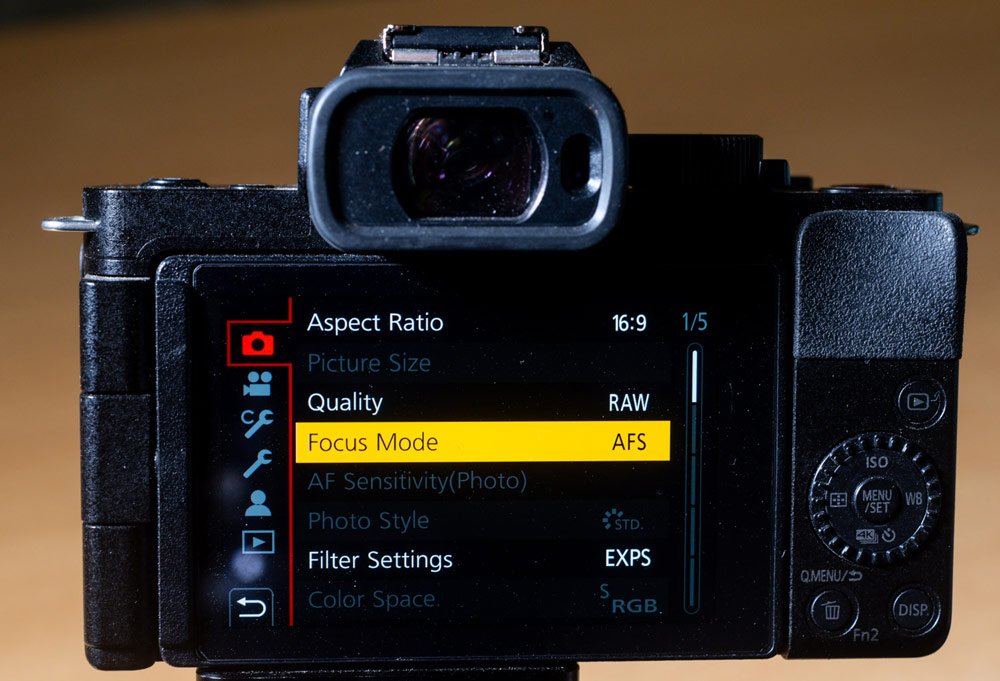
AF-S
Set to AF-S the camera will focus and remain locked in as long as you keep your finger lightly pressing the shutter button. If you take your finger off and partly press again, the camera will refocus. This is good for photographing subjects that are not moving.
AF-S stands for AutoFocus Single Servo. Pressing the shutter button lightly initiates the servos in the camera and/or lens to activate once.
AF-C
In AF-C mode when you partly press the shutter button and hold it there, the camera will continuously focus. As you move your camera or your subject moves, the servos will continuously engage to keep your subject in focus. This mode is usually used for moving subjects. AF-C stands for AutoFocus Continuos servo.
Your new camera has other options to further configure how the autofocus operates. You can let the camera choose where to focus, or you can set this manually.
MF
Choosing Manual Focus mode (MF) disengages the auto focus and you must turn the focusing ring on the lens. This is can be helpful in low light situations or scenes with very little contrast when the camera’s autofocus may not function so well.
Autofocus Point Selection
Every camera has a selection of autofocus points. The more advanced your camera is, the more autofocus points it has. There are often options to limit the number of points or to make use of all of them. Set to multi-point autofocus the camera automatically detects what it perceives is the main subject of your composition. It will not always select what you want it to.
Modern digital cameras have features such as face recognition and eye detection and tracking. These are amazing features but need to be used wisely. They will not always select the face you might want in focus. Autofocus systems are often programmed to focus on what’s nearest to the camera. So if you have two or more people in your photo, the camera will focus on the person closest to you. This may or may not be what you want.
Other options for more precisely controlling where the camera autofocuses are single-point focus or using the touch screen, if your camera has this option.
Single point autofocus allows you to select where you want to focus. This is controlled by a rocker or wheel on the back of the camera. You can see an illuminated indicator in the viewfinder or on the monitor. This allows you to move the focus point to precisely where you want it. Using this option is a little slower until you get used to it. With practice, you’ll find it is more precise and quicker than using multipoint focusing, especially for subjects that are not moving.
Many cameras now have touch screens that allow you to tap the part of your composition you want in focus. This is very easy if you like taking photos using live view mode.
Practicing Using the Focus Controls
Practice using the various autofocus options. Try each with moving and static subjects. You’ll get feel for which modes suit you best when photographing different subjects.
Setting your camera to AF-C and multipoint autofocus is a good combination for photographing some moving subjects. Especially if the subject is not moving erratically. Using AF-S and single point selection can be best for subjects that are not moving.
Your camera will also have the option ot manually focus. You’ll need to locate the control for this which is often a switch on the camera body. Some lenses also have switches to alternate between auto and manual focus.
6. Exposure Modes
As with focusing, digital cameras have options to set your exposure manually or let the camera set it automatically.
To make a good photograph the right amount of light must affect the sensor. This is controlled by the aperture, shutter speed, and ISO. You can set these yourself, or you can let the camera control some or all of them.
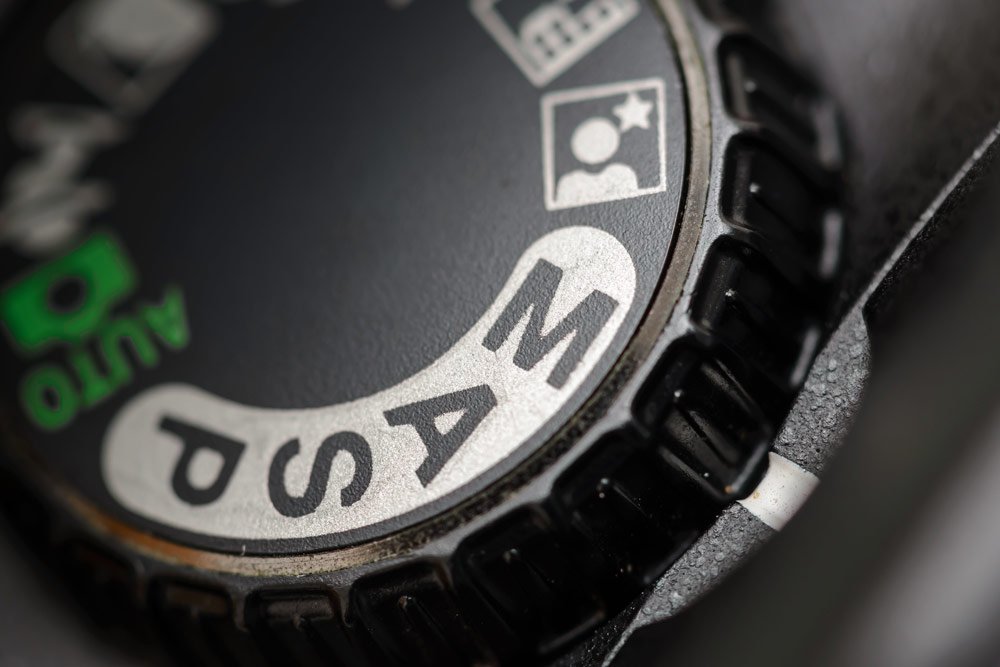
The most common exposure mode is Aperture Priority. This is A or Av on the mode dial. In this mode, you control the aperture and ISO settings. The camera automatically adjusts the shutter speed to produce what it chooses as a good exposure.
Shutter Priority mode is another option. This is S or Tv on the mode dial. In this mode, you control the shutter speed and ISO settings. The camera automatically adjusts the aperture to produce what it chooses as a good exposure.
With the mode dial set to M you are in Manual Mode. You must set the aperture, shutter speed, and ISO to achieve a good exposure. In manual mode the ISO can also be set to auto. When it is, the camera is controlling the exposure.
In Program Mode the camera controls both the aperture and shutter speed settings. You must adjust the ISO.
ISO can be set manually or automatically in any of these modes and also in some scene modes, (this can vary depending on which camera you use.) Read more about ISO settings in the next section.
Some cameras have Scene Modes. These are pre-programmed modes that manage the exposure based on what subject you are taking pictures of.
You can learn more details about how this happens and how you can control it here.
This video introduces you to using manual exposure mode.
Learning to Expose Your Photos Well
Photography means ‘drawing with light’. Photo is about light. Graphy is about drawing, painting, or writing. You have creative options when setting your exposure. If you let the camera set the exposure by using any of the auto modes, your photos will look generic. Your camera is smart, but it is not creative. You are.
The more you can understand light and how to set your exposure, the better photographer you can be. To learn more about how to do this, I have an online course that walks you through the essentials of managing your camera. You can check out this course “Master Your Camera – Master Your Creativity” here.
7. Setting the ISO
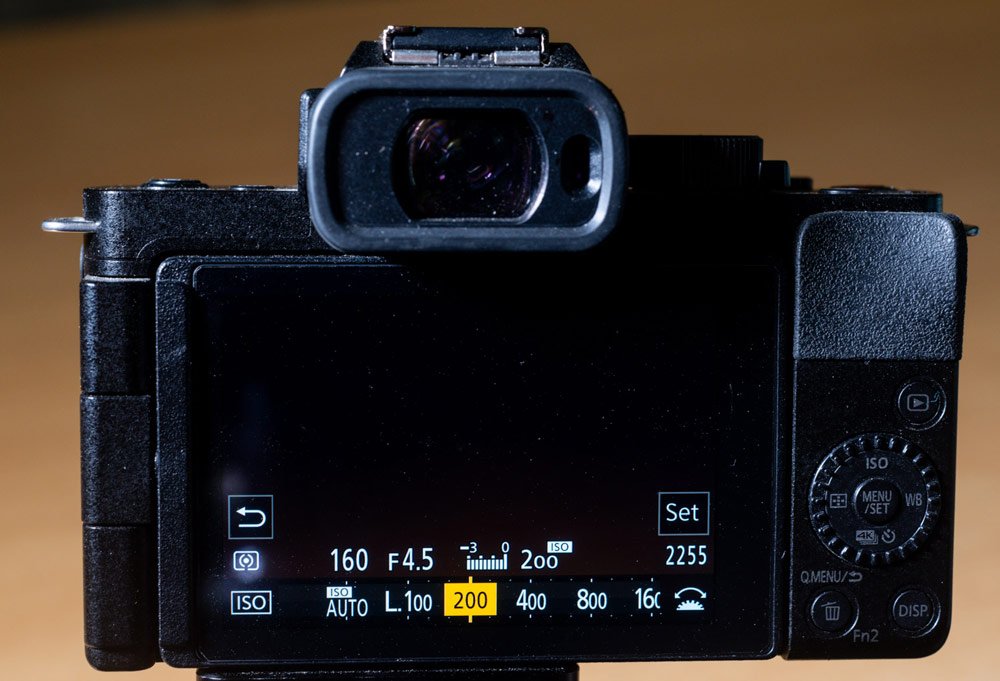
ISO stands for International Standards Organization. This does not help anyone understand what this function does! The ISO setting controls how responsive the camera’s sensor is to light. In bright light, using a low ISO is possible. When the light is low, taking photos with a high ISO is best when you want to also use a fast shutter speed or narrow aperture.
The higher ISO you set, the lower image quality you get. It’s good to keep the ISO as low as possible. I never set my ISO to auto. If you do, the camera controls the exposure, even in manual exposure mode. You risk having a poor quality image if the camera set the ISO too high. In more modern and higher end cameras this is less of a problem because of improved technology.
To learn more about setting the ISO on your camera, please watch this video.
8. White Balance Options on Your New Camera
Setting the white balance on your camera is important so the colors in your photos will look right. If the white balance is incorrect the colors, and white, will look strange.
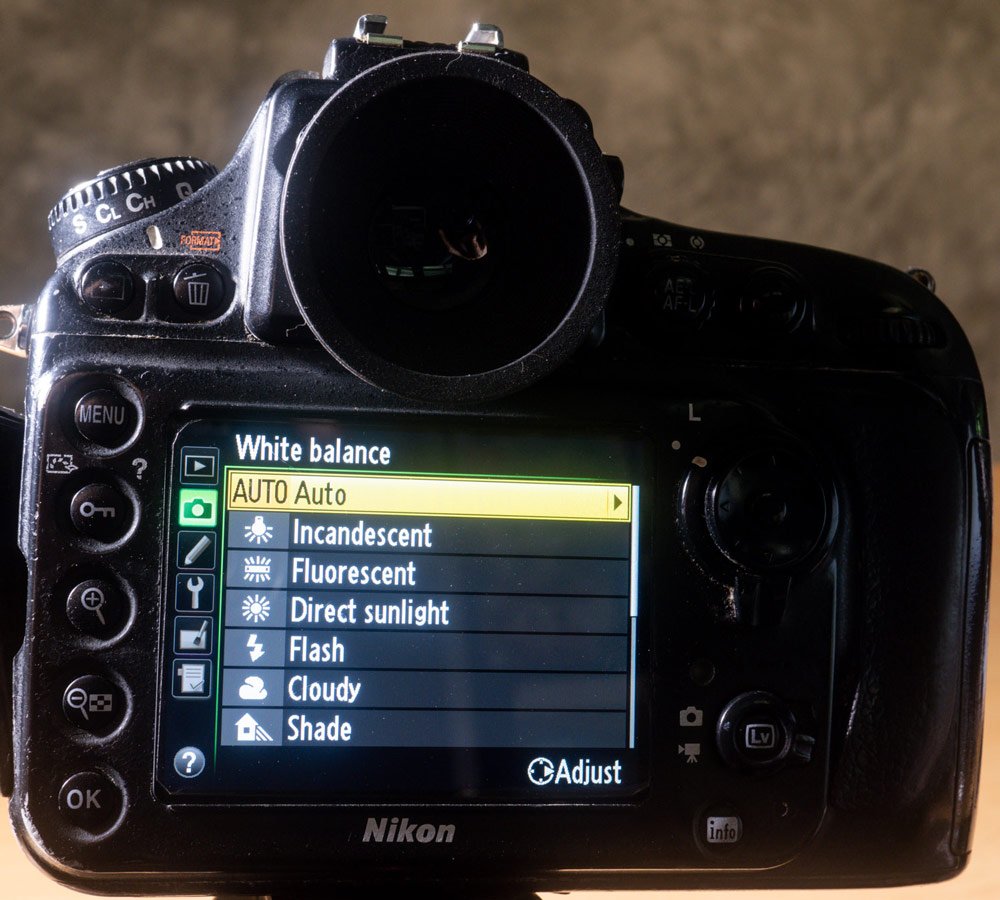
Light is not all the same color. Even daylight can appear warmer or cooler at different times and in different circumstances. Electric lights often produce a color cast. Our brain automatically adjusts what we see. Setting the white balance on your camera ensures that everything looks as it should.
As with focus and exposure, cameras provide the option to set white balance manually or automatically. There is also a selection of white balance presets on most cameras. I find setting the white balance to auto works well most of the time.
9. Zoom Lens Control
Most DSLR and mirrorless cameras come with a kit lens. This lens is a zoom lens that varies the field of view as you twist the control on the lens barrel. Often a kit lens will have a range from 18mm to 55mm. At 18mm you will see a wider angle of view than at 55mm. You can control the zoom to achieve the composition you want.
Zoom lenses may also have some switchs the barrel. One can control focusing distances, the other will turn the image stabilization on and off. Aniother may switch the lens between manual and autofocus.
Not all lenses have stabilization, but if they do it’s best to turn it off when you have your camera on a tripod. On longer zoom lenses the focusing control switch can limit the distance the autofocus searches. This makes it quicker for the lens to autofocus at it not searching such a wide range.
Secondary Controls to Set Up a New Camera
Once you’ve enjoyed using your camera for a while, you’ll discover more about it that you might like to tweak. Here’s the next list of settings to consider adjusting to help you improve your photography experience.
To discover where some of these settings are you’ll need to do some digging around in the menu system. If you can’t find them easily, try doing a specific internet search.
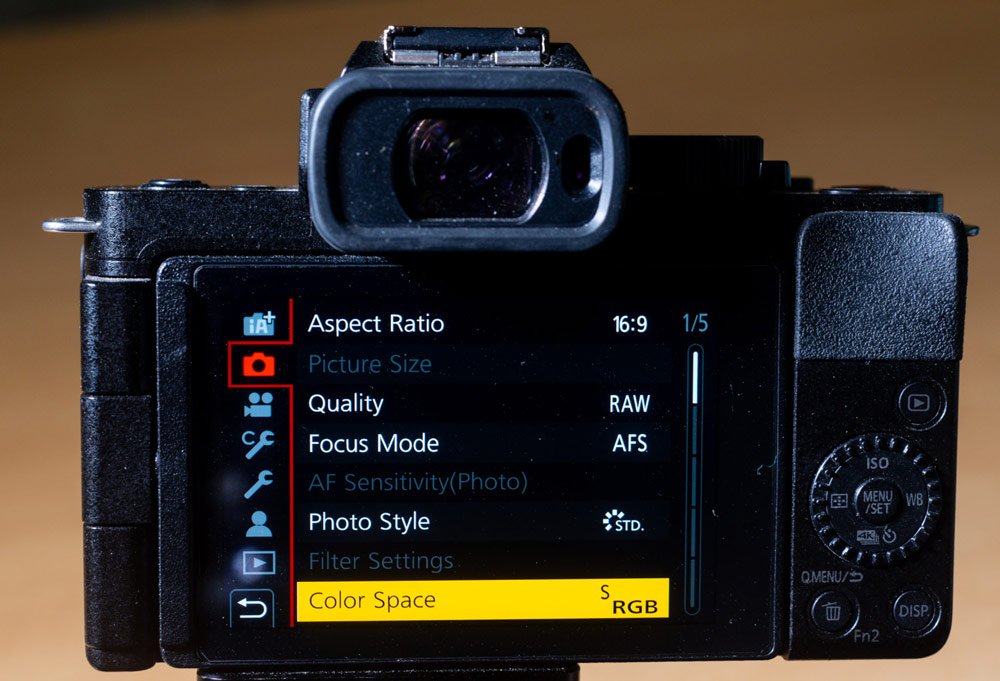
10. How to Set Up the Color Space on Your Camera
There are only two color space options available on most cameras. These are Adobe RGB and sRGB.
Adobe RGB was made to cover all of the colors available for a printer. So this color space will offer better printed reproduction. Most computer, tablet, and phone monitors will not show this full range. The other color space, sRGB, was developed in a partnership with Microsoft and HP to display more accurate representation of colors when viewed on a monitor. Every image on the internet is displayed in the sRGB color space.
If you are primarily editing your photos for sharing online, the sRGB color space will be best. If you aim to edit your photos for printing, choose the Adobe RGB color space.
11. Using the Exposure Compensation Setting
Exposure compensation is used to alter the exposure the camera choose when set to any of the auto modes. The camera will set adust one or more settings to capture what it’s programmed to. This will not always produce an exposure you are happy with. The exposure is increased or decreased using the compensation setting.
The need for this will become more apparent as you progress and learn more about using your camera. When you have your camera set to manual exposure you can more precisely control the exposure settings.
The exposure compensation control is often within easy reach of your right hand forefinger or thumb.
12. Burst Mode Shutter Release Set Up
When you press the shutter release button your camera will take one or more photos. You can adjust this setting so it takes only one frame or multiple frames as you hold your finger on the button.
When set to Burst mode the camera will continue to take photos until you take your finger off the button. There are often two speeds you can set for burst mode, slow speed, and high speed. The number of frames a camera will take per second in each mode varies from camera to camera.
Using burst mode is helpful when photographing moving subjects. It can dramatically increase the number of photos you take and you’ll find your memory cards are filled up quickly unless you are careful with it.
Burst mode is alternatively called Continuous Mode or Drive Mode.
13. Setting Up Flash Controls
Many cameras feature a built-in, pop-up flash. Managing this is important as unwanted flash in a photo can ruin it. On some cameras, the flash will pop up and fire automatically by default when the camera senses the light is low. I strongly recommend that you set up your camera not to do this. It’s best to be in more control of the flash.
In your camera’s menu system look for the entry labeled something like Flash Mode. Here you’ll find a variety of options for controlling the flash. You can opt to turn it on manually, rather than have the camera decide when to use it. There’ll also be options for red-eye reduction, flash sync, and maybe a few more. At first, the main setting you need to control is when and if the flash will fire.
Using a flash well takes study, time, and practice so it’s best when you are getting used to using your new camera not to have to worry about it. If you are interested to learn more about using flash in your photography, check out this article for a creative technique I love to use.
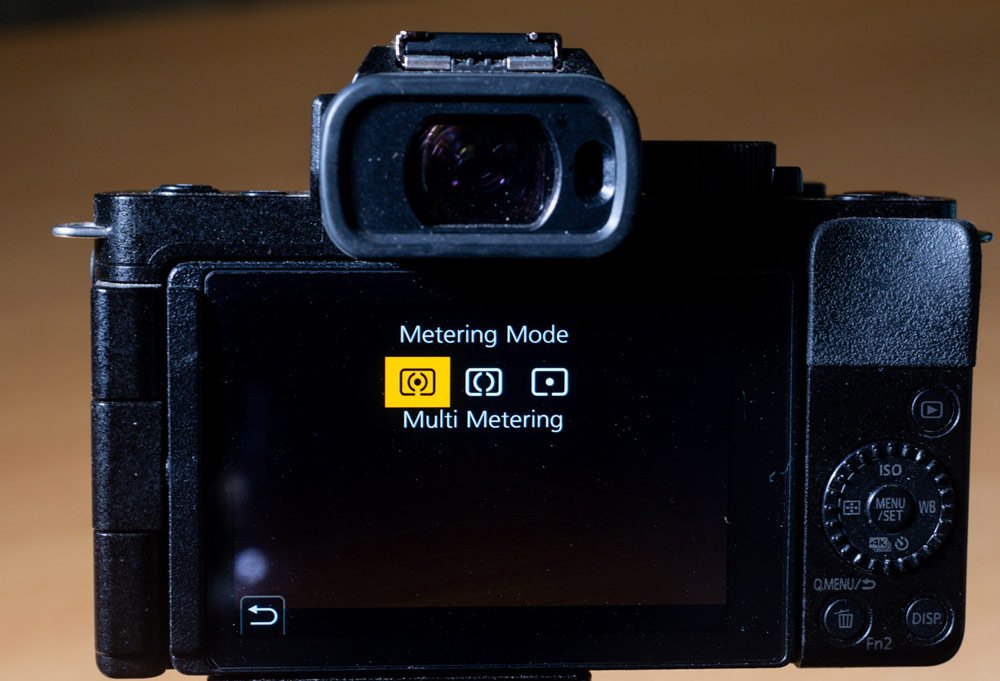
14. Learning to Adjust the Metering Mode
To enable you to set the exposure well, or for the camera to assist you with this, it has a built in exposure meter. This tool measures the amount of light reflecting off elements in your composition. With your camera set to any auto exposure mode the camera uses this information to calculate what it is programmed to for setting the exposure. In Manaul Mode, there exposure meter has a digital display in the viewfinder and/or on the monitor. You can read this information and use it as a guide to set your exposure.
The exposure meter has a variety of modes that help you determine how to set the exposure. On most cameras the default mode is Averaged. This is called Matrix Metering on Nikon. Evaluative Metering on Canon cameras. Other camera brands have a variety of names for it. Basically, Averaged metering mode reads the light from many points of the composition and calculates the average. This is an ideal setting for most situations where the light is even across the composition.
Spot metering is the other main option you can choose for your exposure meter. On this setting you can take a reading from a specific part of your composition and set the exposure for it. This is most helpful in high contrast settings. I will always use the spot meter setting when I am making a portrait. I will take a light reading from my subject’s face and adjust my exposure accordingly because a person’s face is usually the most important part of the portrait. It needs to be well exposed.
There are other metering modes on many cameras that are essentially variations on Averaged and Spot metering. Personally I only ever use these two.
15. Monitor Setting Options on your New Camera
It’s important to set up your monitor well or it can be distracting. After taking a photo the monitor on many cameras automatically displays the photo. I prefer to set the monitor not to show an image after taking it so I can continue to concentrate on what I am photographing. You can turn this feature off so that you can manually control when you want to review your photos. This setting is often called Auto Review or something like that in the camera’s menu.
You can also set the amount of time the monitor will display an image before turning it off. On mirrorless cameras, this is particularly helpful because it helps to preserve the battery.
When using a monitor in Live View mode to compose your photos you can set it to display how the photo will look when you take it. Some cameras are set this way by default. On other cameras, you’ll need to adjust this setting. The advantage of this is most noticeable when your exposure mode is set to manual. You’ll be able to see the effect of changes you make to the shutter speed, aperture, and ISO in real time. This feature will be labeled Constant Preview or something similar in the menu.
There are other options for what the monitor displays that you can explore and configure. Grid lines can be displayed over an image on the monitor. These can help with composition. Other data can be displayed and there are options for how much and what kind of data is displayed. You may only want to see information regarding photos and not the date relating to video. Explore the menu system to discover what options are available on your camera model.

16. Dual Card File Saving
Cameras have one or two slots for memory cards. If you have two slots in your camera you can configure what image files get saved to each card. Many photographers like to save RAW files to one card and jpeg files to the other. This provides them with the option to use the jpeg file, which will often look much better than the RAW file without editing.
Saving the same files to each card is another option. This produces an instant back up of your photographs. In the unlikely event that a memory card is corrupted you will have a back up of your photos.
Yet another option is to use one card for photos and the other card for saving videos on. Or you can use the second card slot as an overflow. When the first card is full the camera will save files to the second card.
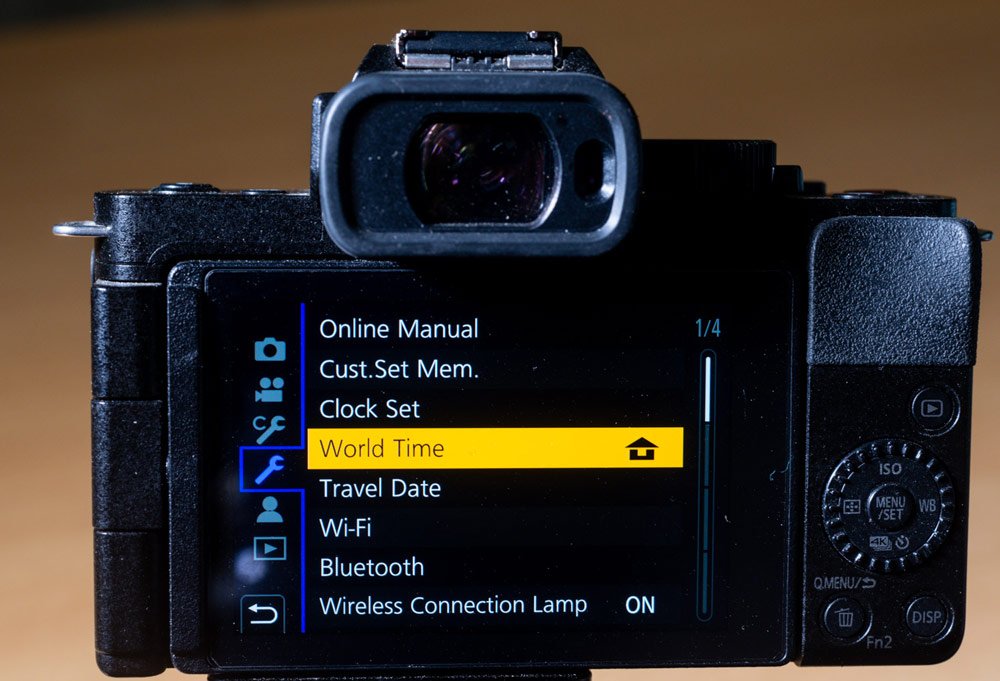
17. Time and Date Set-Up
Setting the time and date on your camera is important because this and other data are recorded for every photo you take. Having the correct time and date helps when you are saving your photos to your computer storage.
18. Image Stabilization Set-Up on Your Camera and Lenses
Some cameras have image stabilization as do some lenses. You’ll need to check your manual and look for specific information about how you can control it. There are a great variety of stabilization options and controls.
The main thing you need to know about stabilization is that it is best to turn it off when you are using your camera on a tripod. If it’s left turned on when the camera is on a tripod or firm surface the stabilization mechanism can actually create motion blur in images.
19. Tips For Changing Lenses
This is not so much a camera setting as it is about forming a good habit. Changing lenses well is important. If you don’t, there are problems that can arise. Before changing lenses, make sure your camera is switched off.
Commonly, there’s a button beside the lens you press and then twist the lens while the button remains depressed. Check your camera manual to learn which direction you need to twist the lens to remove it.
Dust can enter the camera when it has no lens on it and find its way to the sensor. Dust on the sensor is not good as it can show up in your photos as dark spots. Aim to take a lens off your camera and replace it as quickly as you can. Take care not to hold both the camera and lenses carefully. I’ll after removing a lens and as I reach for the replacement, I’ll hold the opening on my camera against my body to help prevent dust from entering.
If it’s windy or you’re in a dusty location, on a beach, or in a desert, you need to take extra care when changing lenses. Anywhere there’s water spray, like near a waterfall, you’ll also need to take care not to allow any stray particles to enter the camera.
If you change a lens and don’t attach the new lens correctly you will see an error message on the camera. Turn the camera off again. Remove the lens and reattach it. Make sure you twist the lens so it attaches correctly.

Additional Controls to Set Up a New Camera
This next list of controls to set up on your new camera will help you enjoy using it more. But they are not so essential as the controls I’ve already listed. At this point, if you’re feeling a little overwhelmed by all the options, come back at a later time to review this list. Bookmark this article so you can find it again and return to it at your convenience.
20. How to Transfer Images to a Computer
The two main ways you can transfer the photos you take to your computer is to use the USB cable that came with your camera or a card reader.
Locate the USB port on your camera and connect it to your computer with the cable. You can then drag and drop the photos into a new folder on your computer.
Using a card reader, remove the card from your computer, and insert it into the correct slot on the card reader. Select the folder on the card with the images and then drag and drop them into a folder on your hard drive.
Transferring to a mobile device can be carried out using a wifi connection or Bluetooth if your camera has these options. Check your camera manual for details.
Some imaging software, like Adobe Lightroom, will detect when you plug a card or camera with photos on it into your computer. It can be set up to notify you when this happens. You can then use the software to carry out the import process. Be sure to check that the images will be stored conveniently on your computer. You may need to select the folder yourself.
21. EXIF Data Viewing
Digital cameras write data related to the images you take and store this information along with the image file. Exchangeable Image File Format (EXIF) data contains such information as time, date, camera and lens specs, and a whole lot more.
You can view this information on your camera and also after you have transferred your photos to a computer or mobile device. It can be helpful in determining the source of some problems you may encounter with your photos. Because the camera records the aperture, shutter speed, and ISO, you can review this information to remind yourself of the settings you used.
Here’s an article that goes into more detail about EXIF data and how you can use it to help improve your photography.

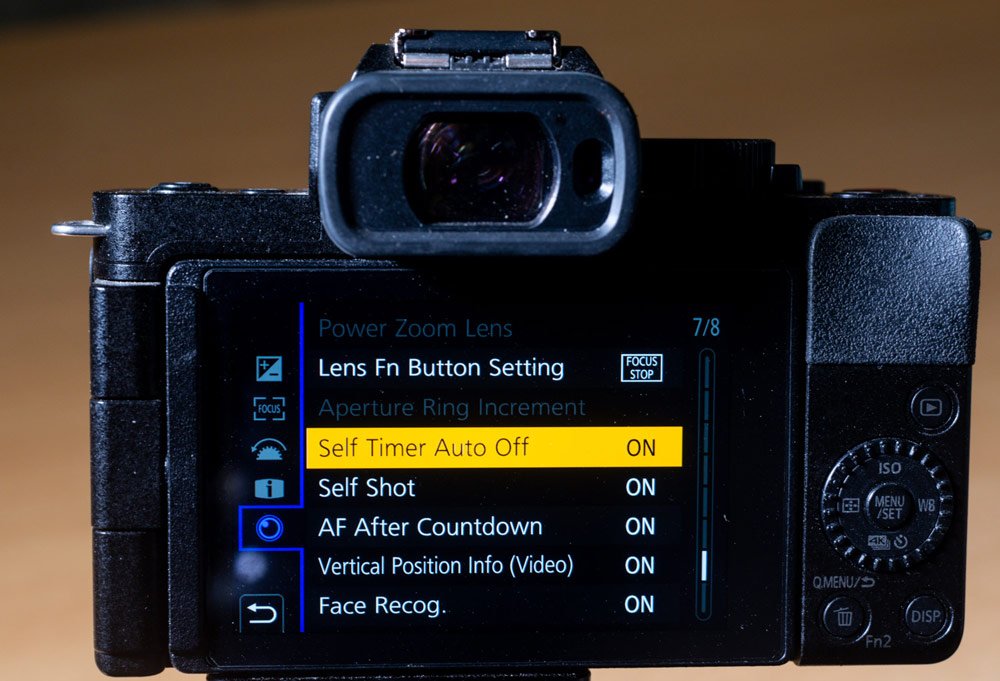
22. Using Your Camera’s Self Timer
The self timer on your camera can be helpful in a few different ways.
You can set the self timer when taking photos of yourself or groups of people where you want to be in the picture also. It’s best to have your camera on a tripod for this so it does not more before or during the exposure.
The self timer is also convenient when you are making a long exposure. This allows you to press the shutter button and not have your hands on the camera when the shutter opens. Using this technique minimizes the risk of camera movement during the exposure. For long exposures it’s also best to have your camera mounted on a good tripod.
Most digital cameras allow you to set the delay time in self timer mode. Depending an what camera you use, the self timer control can be an external button or only accessible through the menu system.
23. Using the Flip Out Monitor
Many cameras have monitors that flip out and can turn in different directions. This is a great feature that allows you to see what your camera is pointing at without having it at your eye level. This is helpful when you want to be a bit sneaky with your picture taking. It can also help you take photos from higher or lower perspective.
Take care when the monitor is open and flipped out from the camera body. It make a camera less compact and the monitor is vulnerable to being damaged. Take care as you open and close the monitor not to put undue force in it.
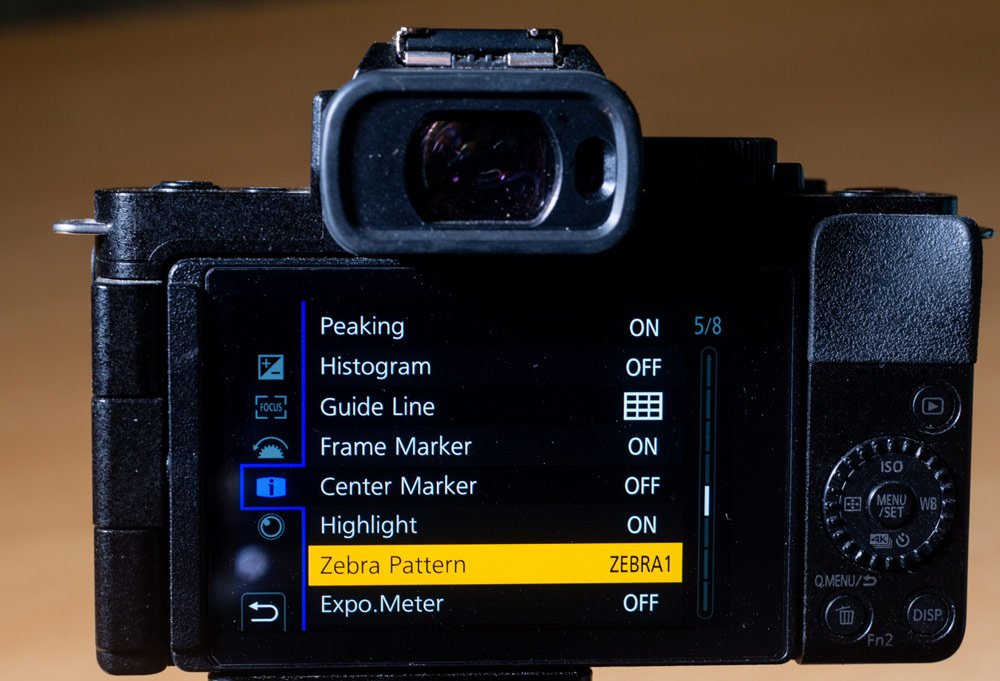
24. The Highlights Indicator
The highlights indicator is a handy feature many cameras have. When this feature is switched on any part of a composition you see in your camera’s monitor that is overexposed with flash or somehow otherwise indicate you have an overexposure problem.
It’s sometimes called the ‘blinkies’ or the .zebra pattern.’
25. Monitor Grid View
Cameras often have a feature you can turn on that overlays a grid pattern on the monitor and possibly also in the view finder. Some cameras have option of for the style of grid. These are designed to help when composing photos. The most popular grid simply has two horizontal and two vertical lines equally spaced. These help you when you’re composing using the rule of thirds.
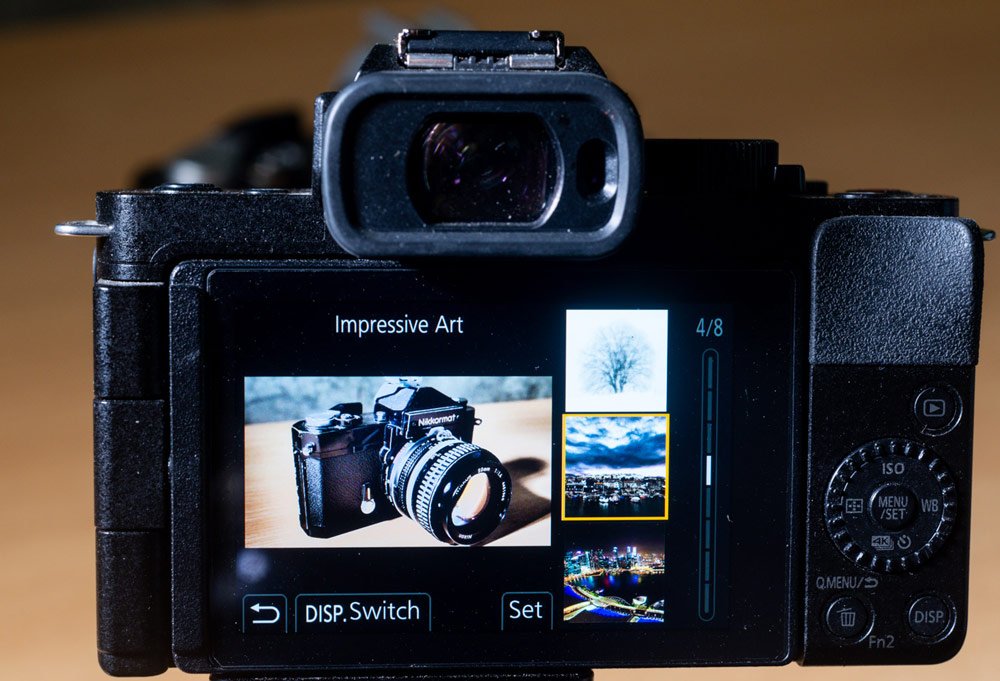
26. Filter Settings
Many cameras allow you to add filter settings when taking photos. These can be programmed in the menu system to alter how your images will appear. They include settings like black and white, sepia, Expressive, High Key etc. I prefer not to add this type of filter in camera but leave any editing until I am editing my photos on the computer.
27. WiFi and Bluetooth Set Up on Your Camera
WiFi and Bluetooth features have become very popular on modern digital cameras. They assist in sharing and saving photos as well as controlling the camera from a remote app. Check your camera manual or do an online search for details.
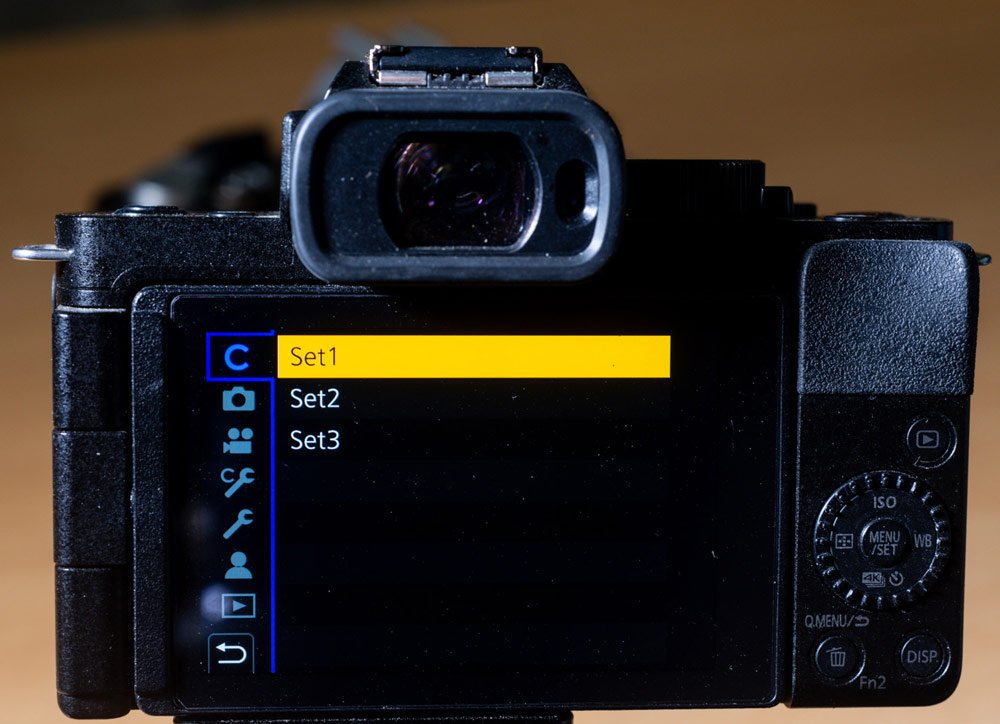
28. Customizing the Settings on Your Camera
You can save custom settings on many cameras. These are helpful when you have different subjects you like to photograph often. Maybe you like to photograph birds in the wild and still life images set up on your kitchen table. Both these types of photography require different camera settings.
You can configure one set with a faster shutter speed, narrower aperture, and other controls you might prefer for when you’re photographing birds. Then you might like another set with adjustments made specifically for when you are taking still life photos indoors. Again, check your camera manual or do an online search to find out how to set this up. Each camera company has their own way of set up for this feature.
29. Back Button Focus
I’ll finish with one of my favorite camera tweaks. It’s called back button focus. With this set up on your camera, the shutter release button only takes a photo when you press it. The autofocusing is disabled on the shutter button and assigned to one of the buttons on the back of the camera. This is usually a button located so it’s convenient to use your thumb to press.
Using this set up you can focus and take photos independently of each other. This can help you be more precise with your timing as you know when you press the shutter release button the camera does not first have to check focus.
You’ll need to explore your camera’s menu (and maybe the manual) to learn how to enable this feature.

New Camera Set-Up Guidelines
I hope this list will help you to set up your new camera. Take your time to review these items and how they relate specifically to your new camera. Bookmark this article so you can check it again. After making some changes you may find that after using your camera for a while you want to make further adjustments. Come and check these lists again.
New digital cameras are so much more complicated than they used to be. Camera companies love to cram new models full of wizardry because they know lots of photographers love that stuff. But it can be so distracting when all you want to do is take some good photos.
Once you have the essentials and a few more settings adjusted on your camera you’ll enjoy your photography a lot more. This is why I have developed this list. If there are other items you think I could add that would be helpful to know when setting up a camera, please let me know in the comments area below.