How do you take good blurred background portraits? The best way is to use a portrait lens with a wide aperture.
I prefer to use my 105mm f/2.8 or my 85mm f/1.4 lenses. Sometimes I also use my 35mm f/1.4 lens, although it’s not considered a portrait lens.
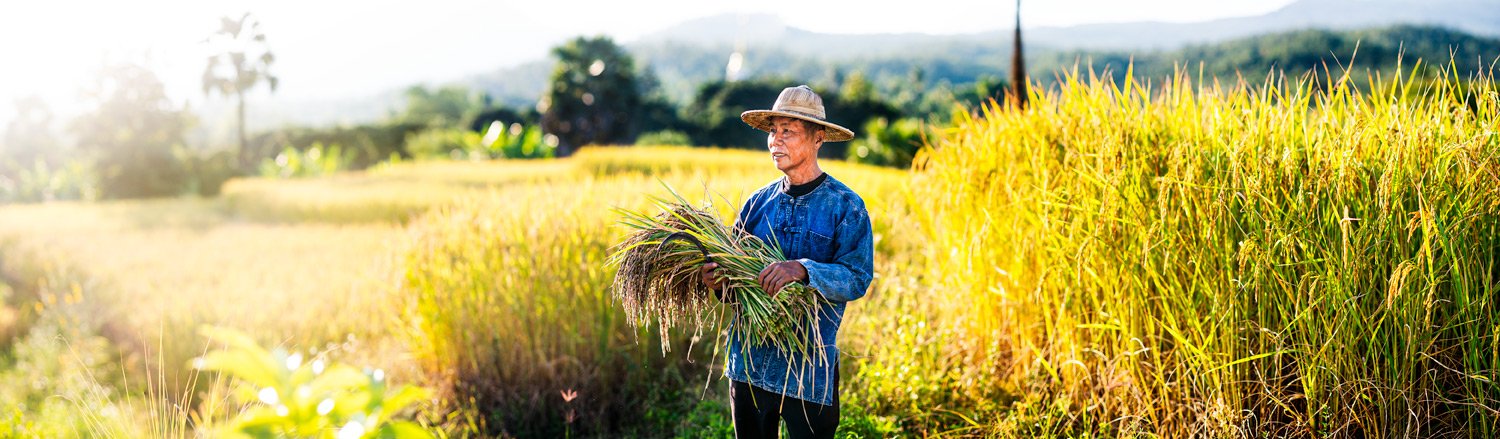
I made this portrait using my 85mm lens, but it’s not a single photo.
Stitching a Panorama Portrait
This portrait is made up of eight individual photos. Using an 85mm it’s not possible to capture such a photo. The field of view of the lens is not this wide.
Using a wider lens, like my 35mm would also not produce the same look. The angle of view would be about the same, but the background would not be so blurred.
By photographing my subject and then more of the background I was able to create a wide photo with lovely bokeh.
This technique is called the Brenizier Method. Ryan Brenizier, a New York photographer, developed this idea of combining wide aperture photos in a panorama.
To create portraits using this technique you’ll need a lens with a wide aperture. The longer the lens the more pronounced the effect is. A 50mm would be the minimum focal length I would choose. Using a wide lens with a wide aperture you’ll run into a few problems. My 85mm is perfect because it’s widest aperture setting is f/1.4.
Creating the Portrait
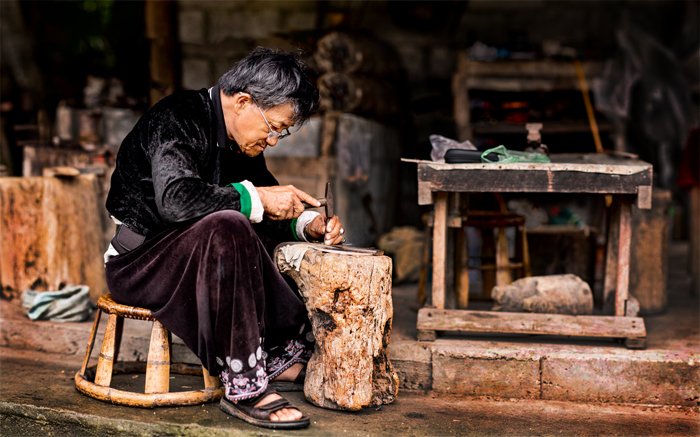
During rice harvest time there’s a huge amount of activity around our home. The landscape looks fabulous. The evening light is rich and I had a neighbor willing to pose.
I wanted to include the rice more prominently than only in the background. Knowing everything behind my subject would be a blur, I handed him a bunch of cut rice to hold. This also helped him feel relaxed and added story to the portrait.
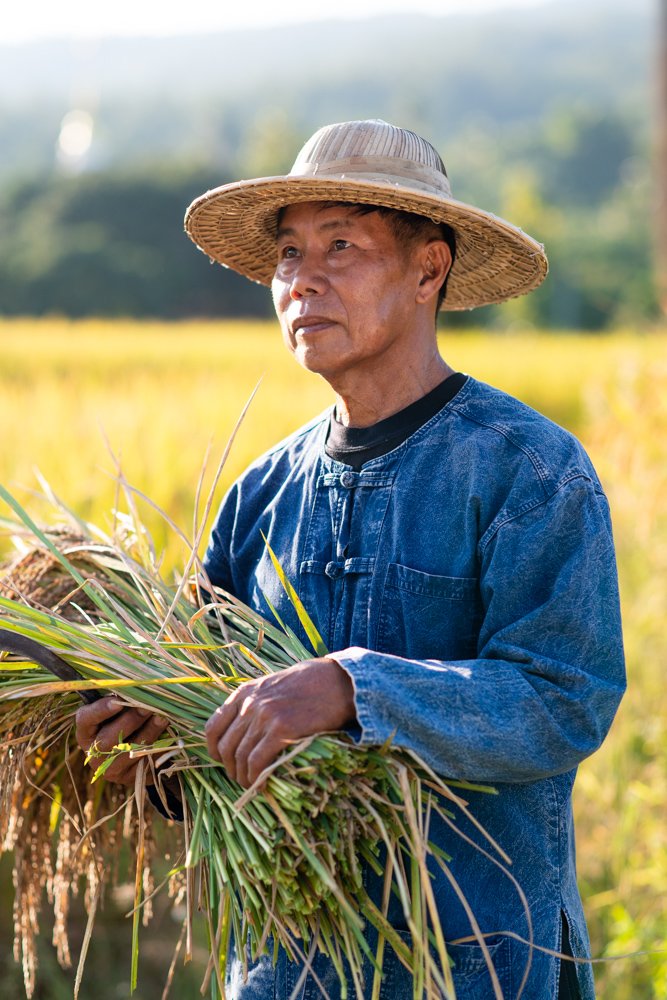
To find the best position for him I made a few test photos. I wanted to see how blurred the rice behind him would look. If it was not blurred enough, I moved him further away from it. I then positioned myself at a good distance from him so I could frame him to fit in one composition.
I did not want to have to stitch photos together that included different parts of my main subject. This would be problematic if he moved at all.
I had my wife hold a reflector to pop in a little more light. Because the sun was low in the sky the backlighting was strong. Adding a reflector helped balance the exposure between my subject and the background.
With the distance and light to my liking, I made a series of regular portraits with my lens aperture set to f/2.8. Using a wider aperture setting rendered the background too soft. It also meant that not enough of my subject was in focus.
Creating the Panorama Photos
After making a selection of portraits I then turned my attention to photographing the blurred background.
My intention for this blurred background portrait was to create a wide panorama. This best suited the location and the look of the ripe rice. In another location I could have included more foreground and sky.
With this style of blurred background portrait it is not necessary to remain confined to a traditional panorama format. Instead of taking all your photos following a horizontal line, you can include more above and below. This is very much how I create the more cubist photogmontages I love to make.
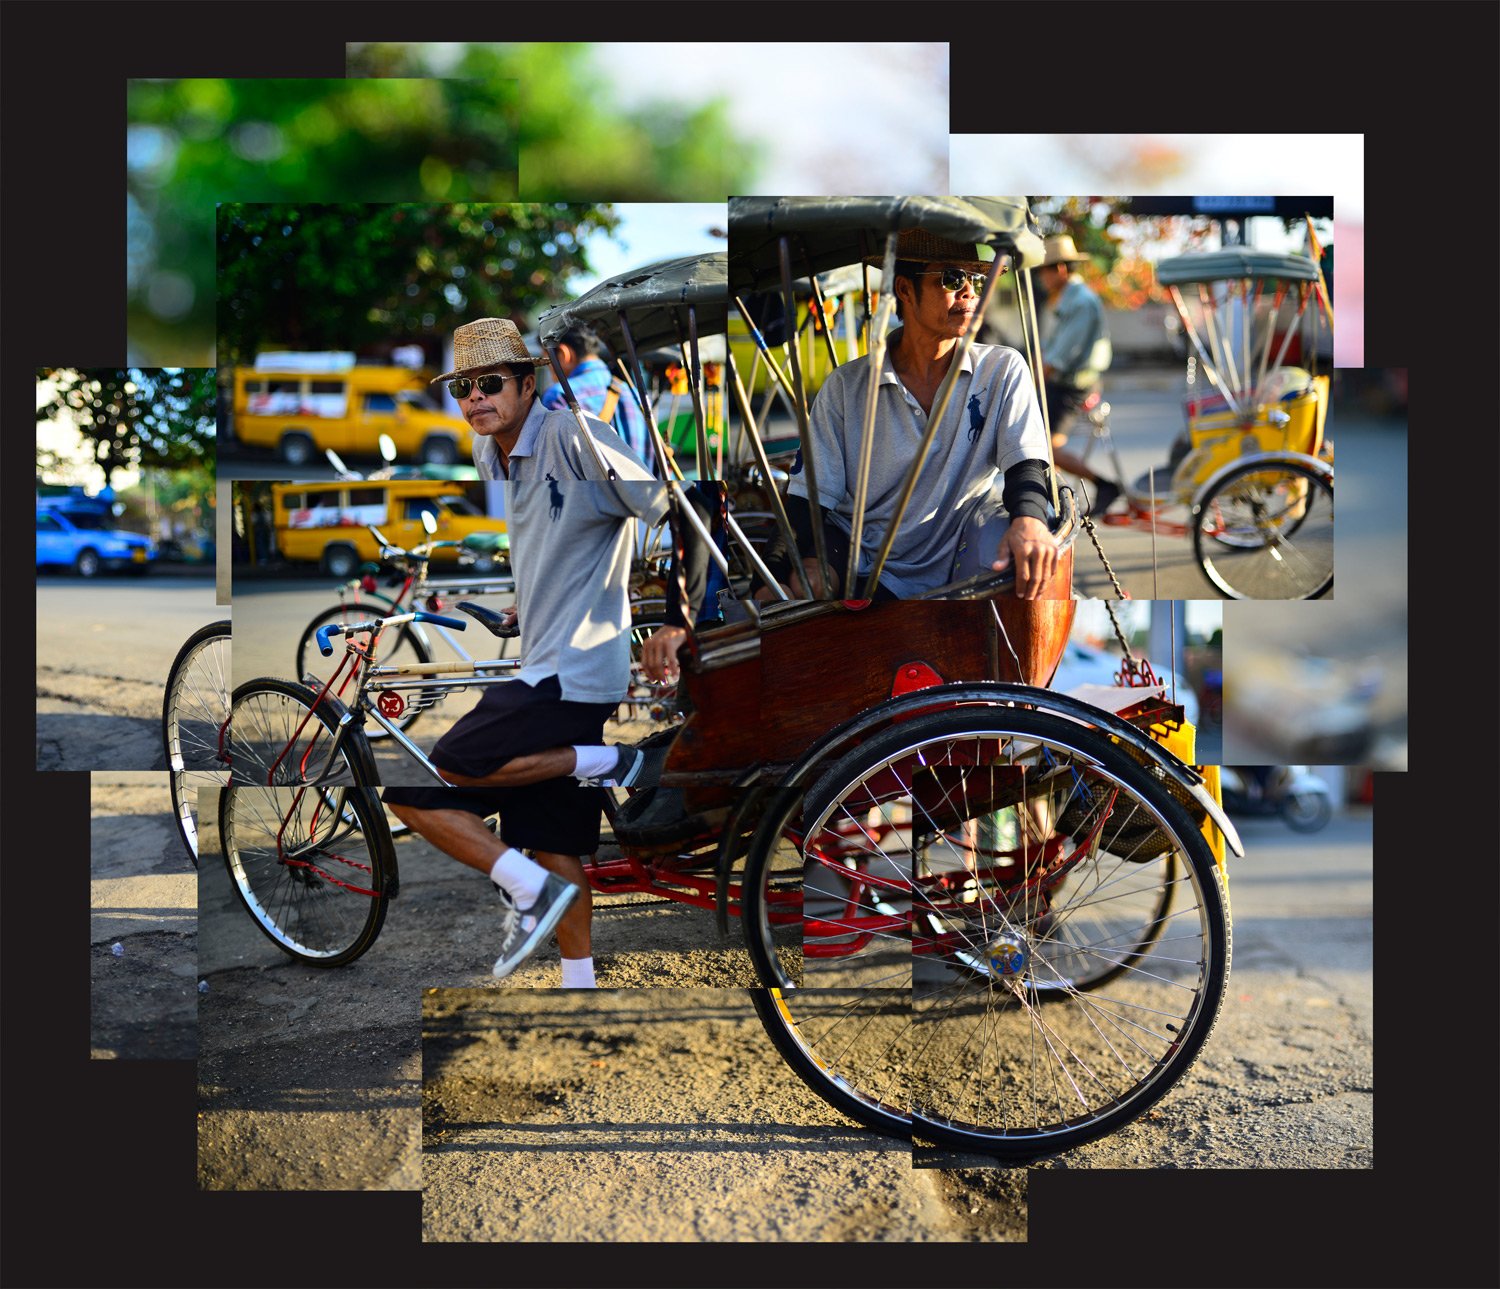
I composed the photos for the background by starting on the right of my subject. In the first frame I include part of him. Then I turned my camera a little to the right and took another photo. I repeated this process a few times making sure that each composition overlapped the previous one by about 30%.
Overlapping by at least 30% makes it easier to align the photos later. If you do not capture enough overlap stitching together the blurred background portrait does not work properly. You can end up with gaps or lines in the finished panorama that do not match up well.
Once I had enough photos towards the right, I repeated the process to photograph the left-hand side of the scene.
With more complicated backgrounds you’ll need to take more photos. Having a variety of images means the stitching process will work better. I’ve made a few blurred background portraits with complicated backgrounds that did not work. I hadn’t taken enough photos so when I came to stitch them together the background was not seamless.
Stitching Together Blurred Background Portraits
I like to use Photoshop to create my blurred background portrait panoramas. I use this program a lot and am very familiar with it. There are a few alternatives, such as Lightroom and Image Composite Editor (ICE) ICE is free to download and use.
Before beginning the stitching process I choose each of the photos I will use. Having taken more portraits than I need, I picked the best one. Where my model has an interesting expression and the light is right.
Once I have the photos selected I then use Photoshop to stitch them together automatically. This is the easiest way to make a seamless panorama. You can manually align the photos, but it’s more difficult to achieve a seamless look. The software unusually does a great job of it. If you’re using Photoshop go to the File menu and choose Automate>Photomerge.
After I have merged the photos I’ll flatten them to one layer before making any color or lighting edits.
Making Blurred Background Portraits is Fun
Try this and see. Making blurred background portraits using this technique require more creative thought. It also takes more time to make the photos and process them. But the results can be impressive.
You may need to make a few attempts before you get a portrait you like. With any photography technique like this it can mean a little trial and error to end up with a result you like. Experiment and practice and you will be successful.
Let me know how you get on. If you have any questions about this process, please post them in the comments section below.
can i use the farmer pic for international labor day greeting?
Sure. Please credit – © https://www.kevinlj.com