Luminar Neo is exciting, easy to use photo editing software. In this Luminar Neo review I share my experience of working with this as an alternative tool for editing your photos.
This AI driven image editing app is packed with tools that will bring your photos to life. And learning to use it won’t drive you crazy. Luminar Neo has a simple to navigate interface largely built around presets and slider controls. In no time at all you’ll be achieving results it could take days or weeks to learn using more traditional photo editing software.
Read on to discover how this Luminar Neo review will help transform your photos so they win more ‘likes’ when you post them to your social media accounts.


Luminar Neo for Beginners
I’ve taught oodles of people how to use their cameras. My main aim is to help them become confident and comfortable in knowing what to do with the controls. But, these days, using your camera well is only part of what it takes to create stunning photographs.
Editing, or post-processing, contributes massively to how your photos look. Learning to edit is as important as learning how to use your camera.
Luminar Neo, by Skylum, is image editing software that’s designed for people beginning their photographic journey. It’s pretty straightforward and less complicated than programs like Lightroom and Photoshop. And you can use it on both Windows and Mac computers.
At the same time, Luminar Neo is suitable for professional photographers seeking to speed up their image editing workflow. This software also runs as a plugin for both Adobe Lightroom and Photoshop.

Switching from Phone to Camera Photo Editing with Luminar Neo
You’re probably used to using an app to edit photos you take with your phone. Now, in transitioning to using a camera, you’ll need superior tools for editing. This is where Luminar Neo comes in. Learning to use this software is quite a lot like using a mobile image editing app, but it’s a lot more powerful.
Making the switch from using a mobile app that’s fully automated, to using Luminar Neo, is not difficult. When you begin to edit, you’ll discover many presets and AI powered photo editing sliders that lead you towards making the best editing choices. When you’re comfortable with these, then you can dive into the robust collection of manual editing tools available in Luminar Neo.
These presets are AI driven and designed to make your photos more appealing for posting to social media, or however else you like to share them.
Once you’ve selected a photo and clicked the Presets button at the top of your screen, Luminar Neo starts to work its AI magic. Within a few seconds you’ll see a list of suggested Preset Collections in the top right. Luminar makes this selection automatically based on the content of your chosen photo.

Keep this in Mind
Think about the feeling you want to convey with the photo. How will it fit into your social media feed and look alongside your other photos? Consider sticking to a few of the presets that best represent your style.
Clicking one of the Collections displays the presets within. You can then hover over each preset to see how the edit applies to your image. All you then need to do then is click the option you prefer. It’s as simple as that.
If you want to reduce the influence of the preset, use the slider that appears next to it. Dragging the slider to the left tones down the prest.
Once you’re happy with the way your photo looks, go to File/Export to save your edited image.
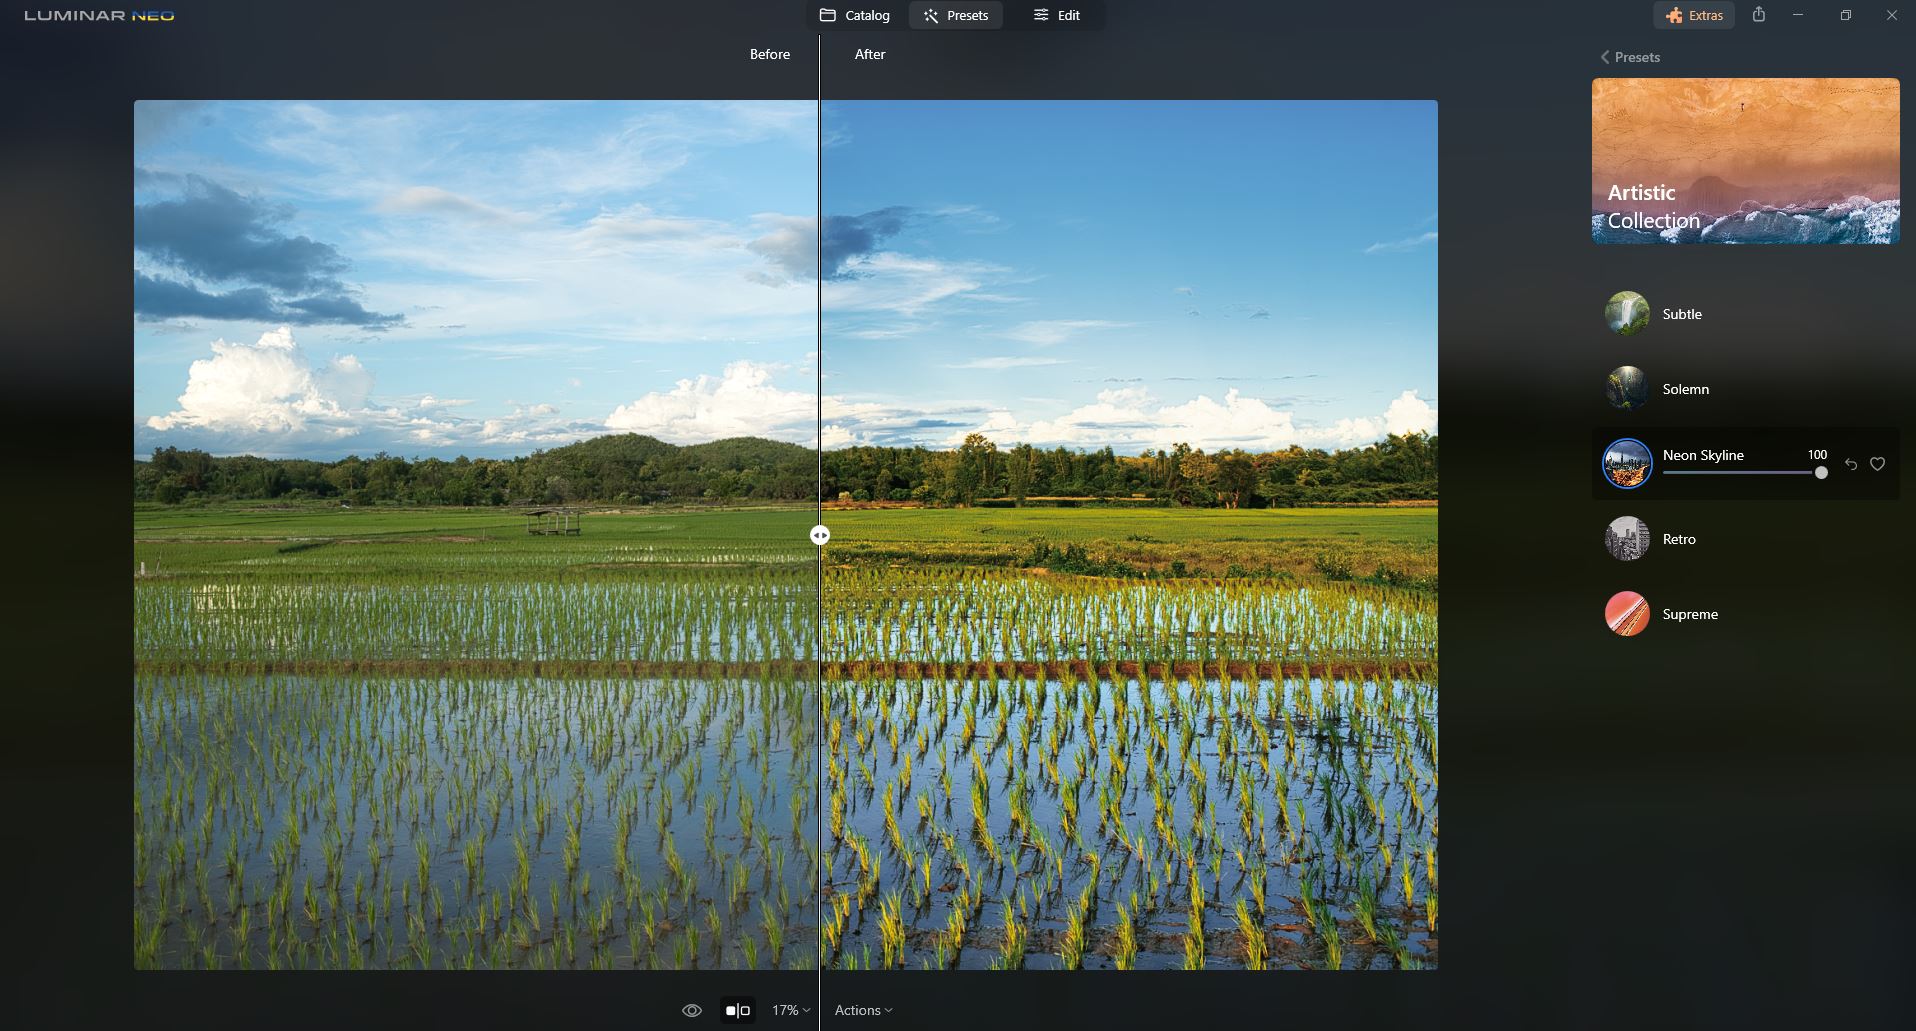
I’ve applied the Neon Skyline preset from the Artistic Collection to this image. When applying the preset you can activate the Compare option below the image. This allows you to see a split screen of your original photo and the effect of the preset.
Luminar Neo Preset Collections
The intuitive AI options provide a variety of different Preset Collections. If you can’t find a preset in one collection, you can choose from other suggested Collections, or pick one from the list. These include:
- Essentials
- Landscape
- Mother Nature
- Portrait
- Macro
- Cinematic
- Lifestyle
- Aerial
AI driven presets are a fabulous learning assist when you’re new to photo editing or you’re short on time. As a new user the presets help you realize the possibilities.
The more you use them, the more you’ll come to understand how you can control the look and feel of your photos. With experience, you’ll instinctively come to know the way you want your pictures to look. And which presets to use to achieve that look.
Start by experimenting with as many as you have time for. Apply different presets to the same photo so you can see the differences and find the ‘looks’ you love. Then stick with these ones. The more consistent you are in using a handful of presets, the more you will develop your own editing style. This will begin to shape the look and feel of your Instagram feed and other social media postings.
When you are comfortable with editing, you can apply the most appropriate preset with confidence.

Three Powerful Luminar Neo Features
Once you’re familiar with using Luminar Neo’s presets there are three other powerful features to experiment with.
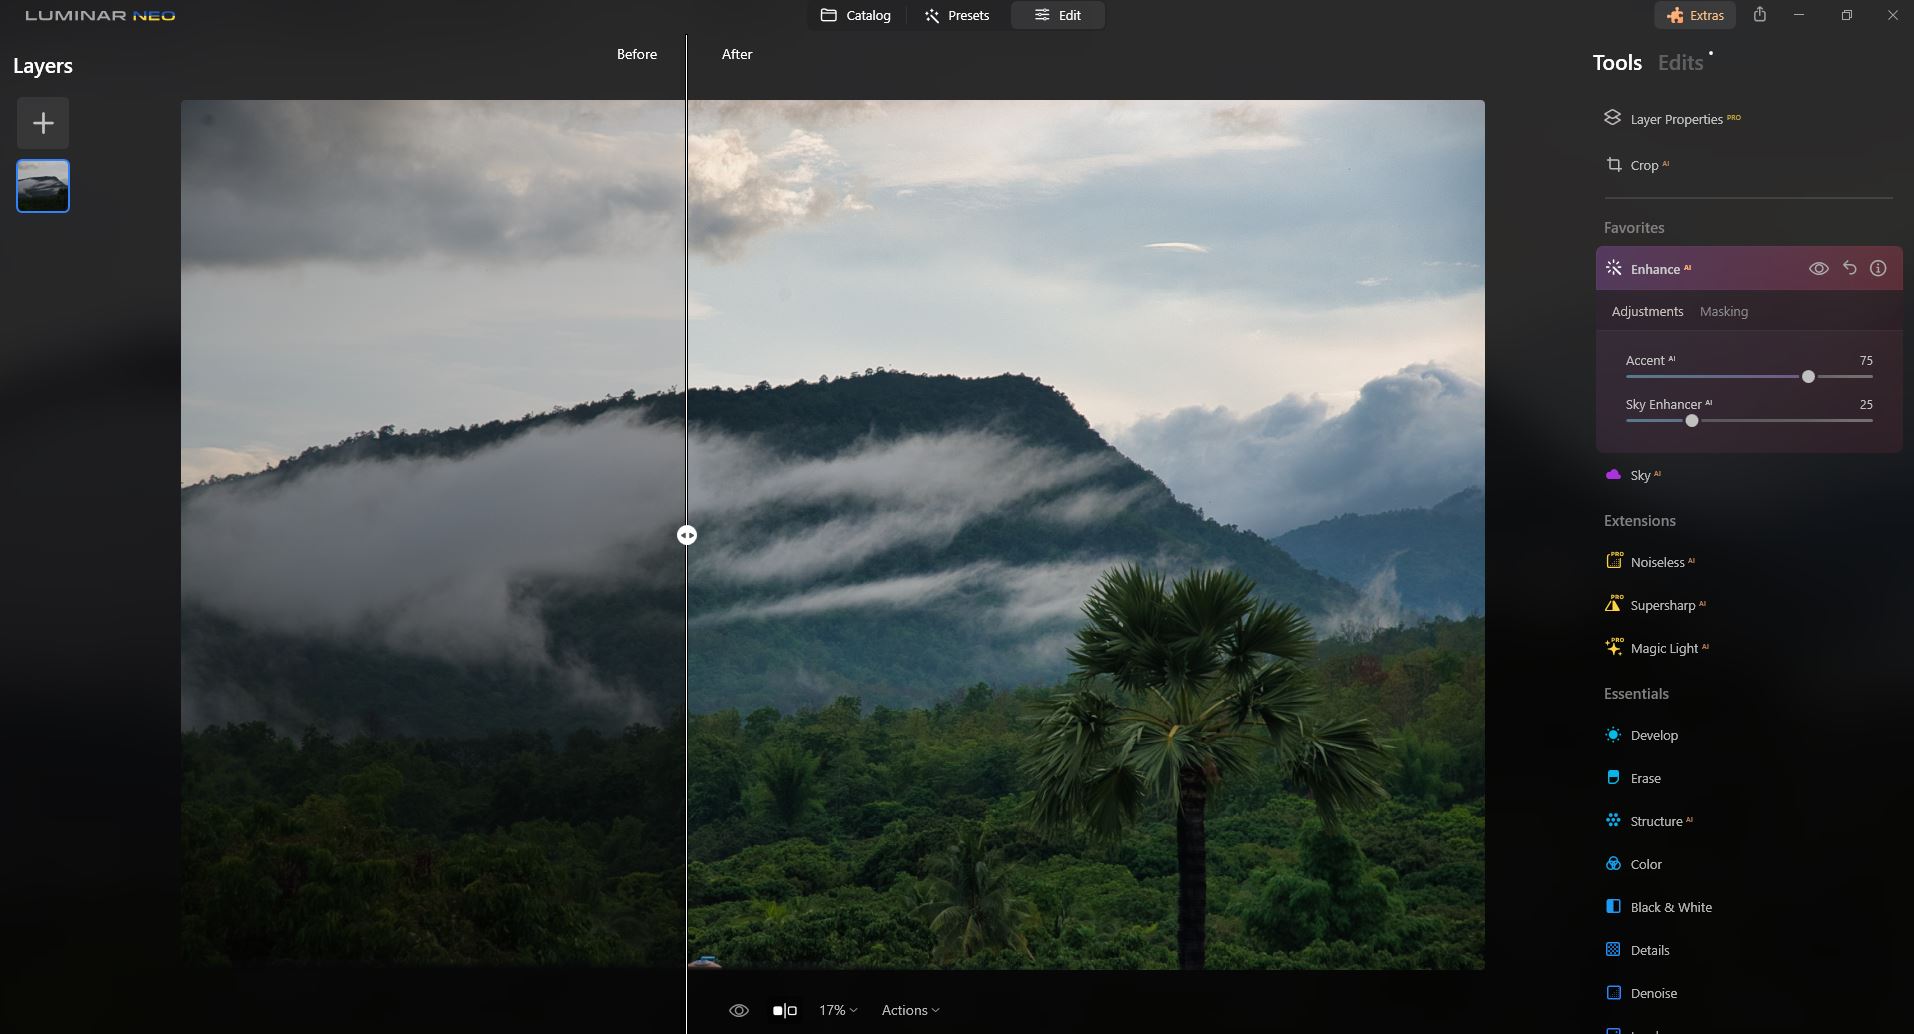
Three main features that stood out for me are the Accent AI, Structure AI, and the Sky AI. Each of these are powerful tools that can be easily applied, and tweaked if you like, to enhance your photographs with only a few mouse clicks.
Accent AI
Accent AI in Luminar Neo is a one slider editing magician. To discover this slider when you click the Edit option at the top of your screen. Then click on the Enhance tab in the Essentials menu.
The Accent AI slider manages multiple edits simultaneously. Watch closely as you drag the slider and you’ll notice changes in up to a dozen areas such as:
- Shadows
- Highlights
- Contrast
- Tone
- Saturation
- Exposure
- Details
- And more
Using other image editing software you must manage each of these controls separately. In Luminar Neo you can sit back and let the AI do all the hard work.
Much of the time the results are more than pleasing. If they’re not, you can manually tweak any control you like. Use the Edit sliders, in particular those in the Essentials and Professional menus.
Structure AI
Structure AI is yet another powerful AI tool you’ll find in Luminar Neo. With this tool you can boost the clarity of your subject in just the right places.
The AI evaluates each photo you work on and enhances the texture and contrast of your subject. This is designed to add depth and draw the viewer’s eye to essential elements in your composition.
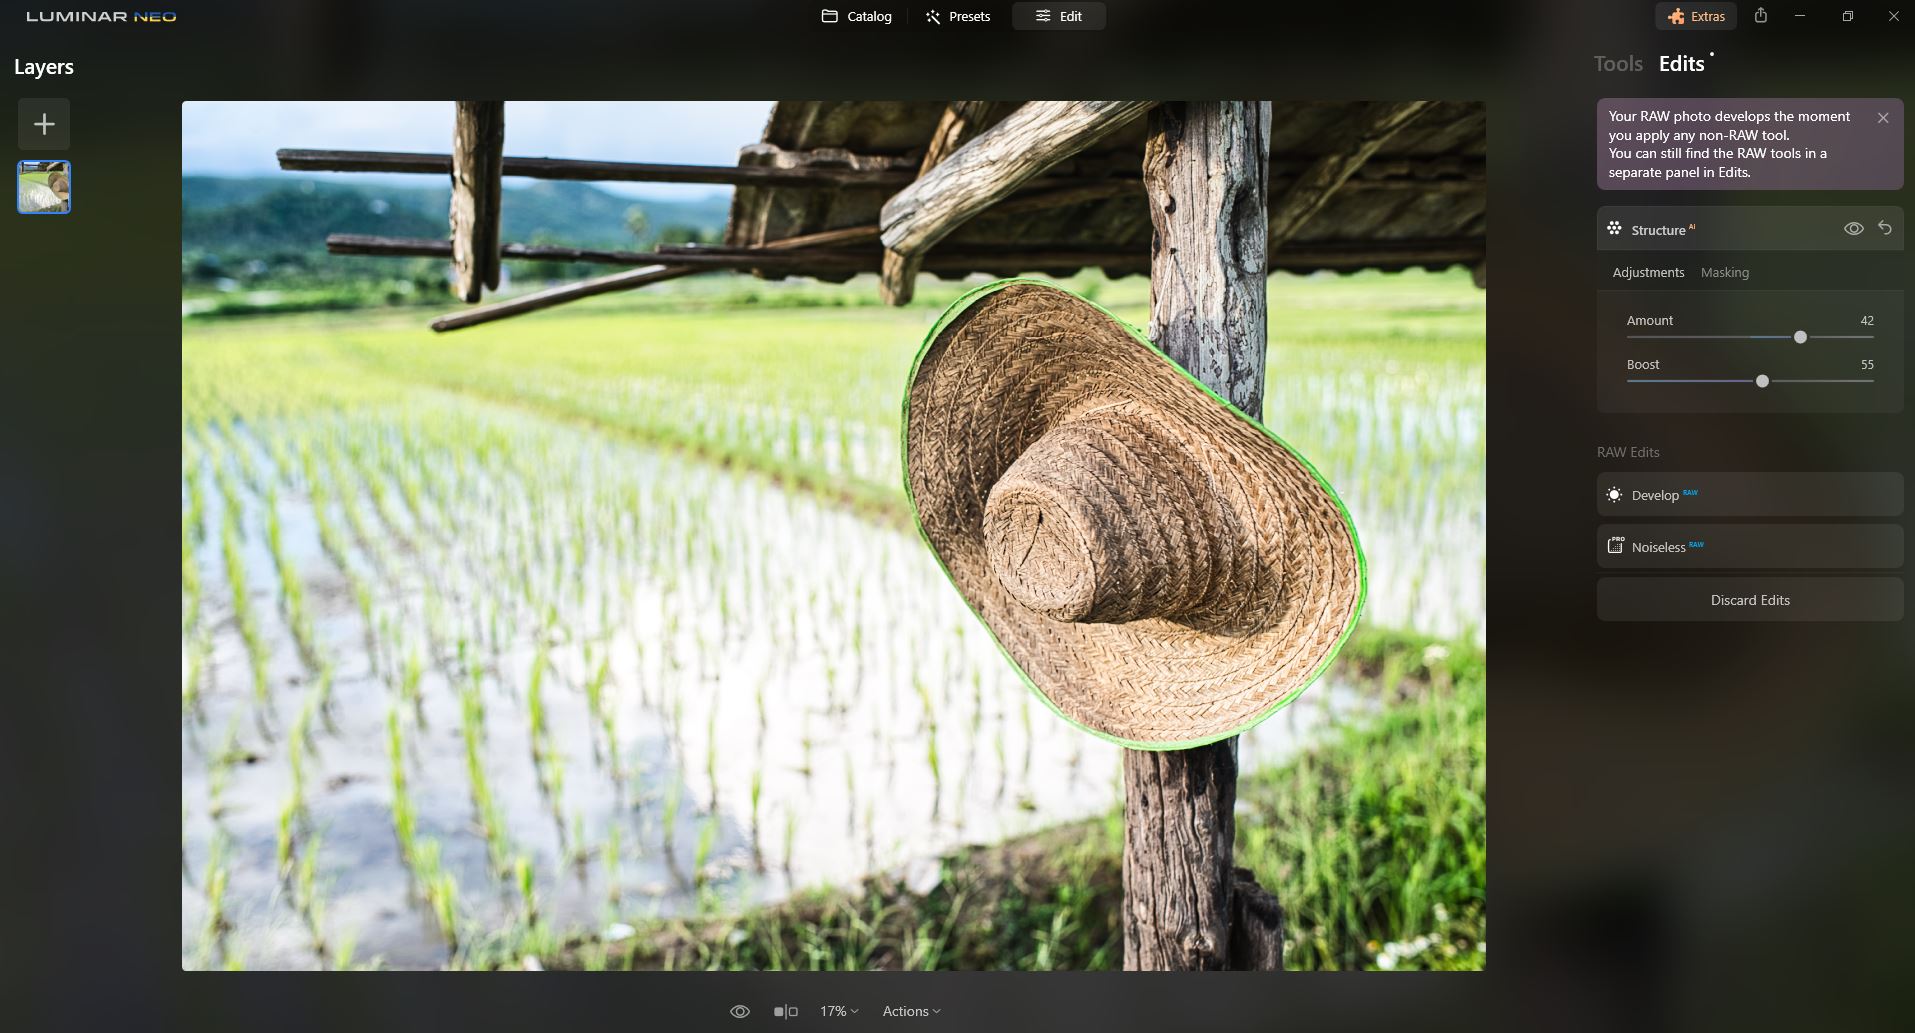
In this example I love how using Structure AI enhances the hat and the timber in the old shack. It also affects the background subtly bringing slightly more clarity. Any more than this and the background would begin to look unnatural.
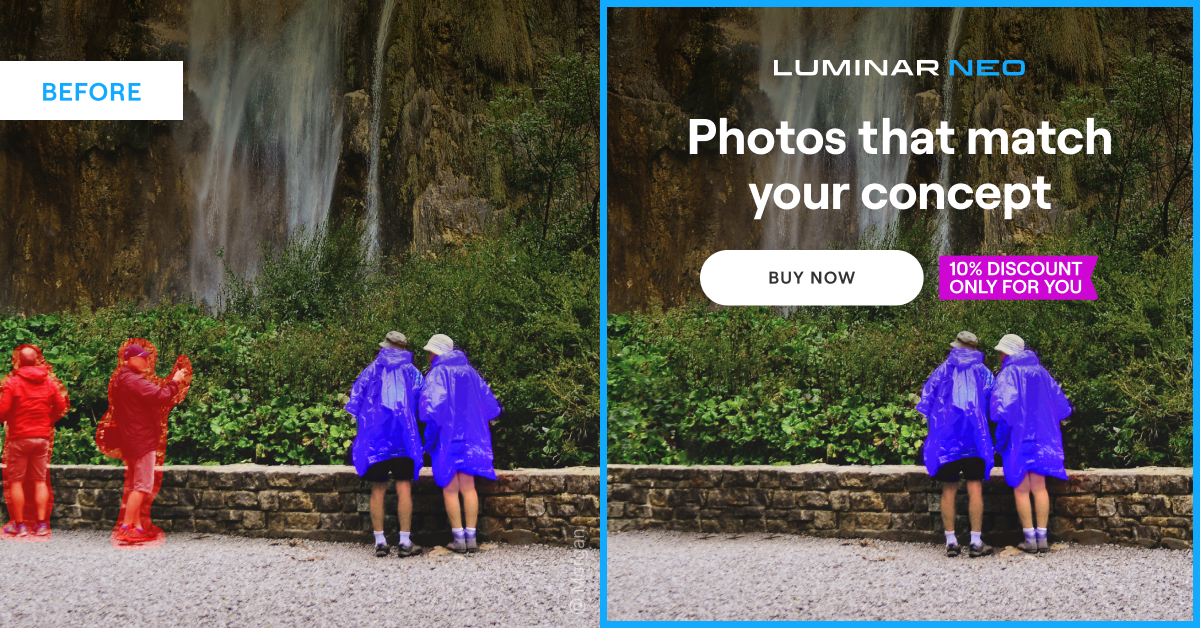
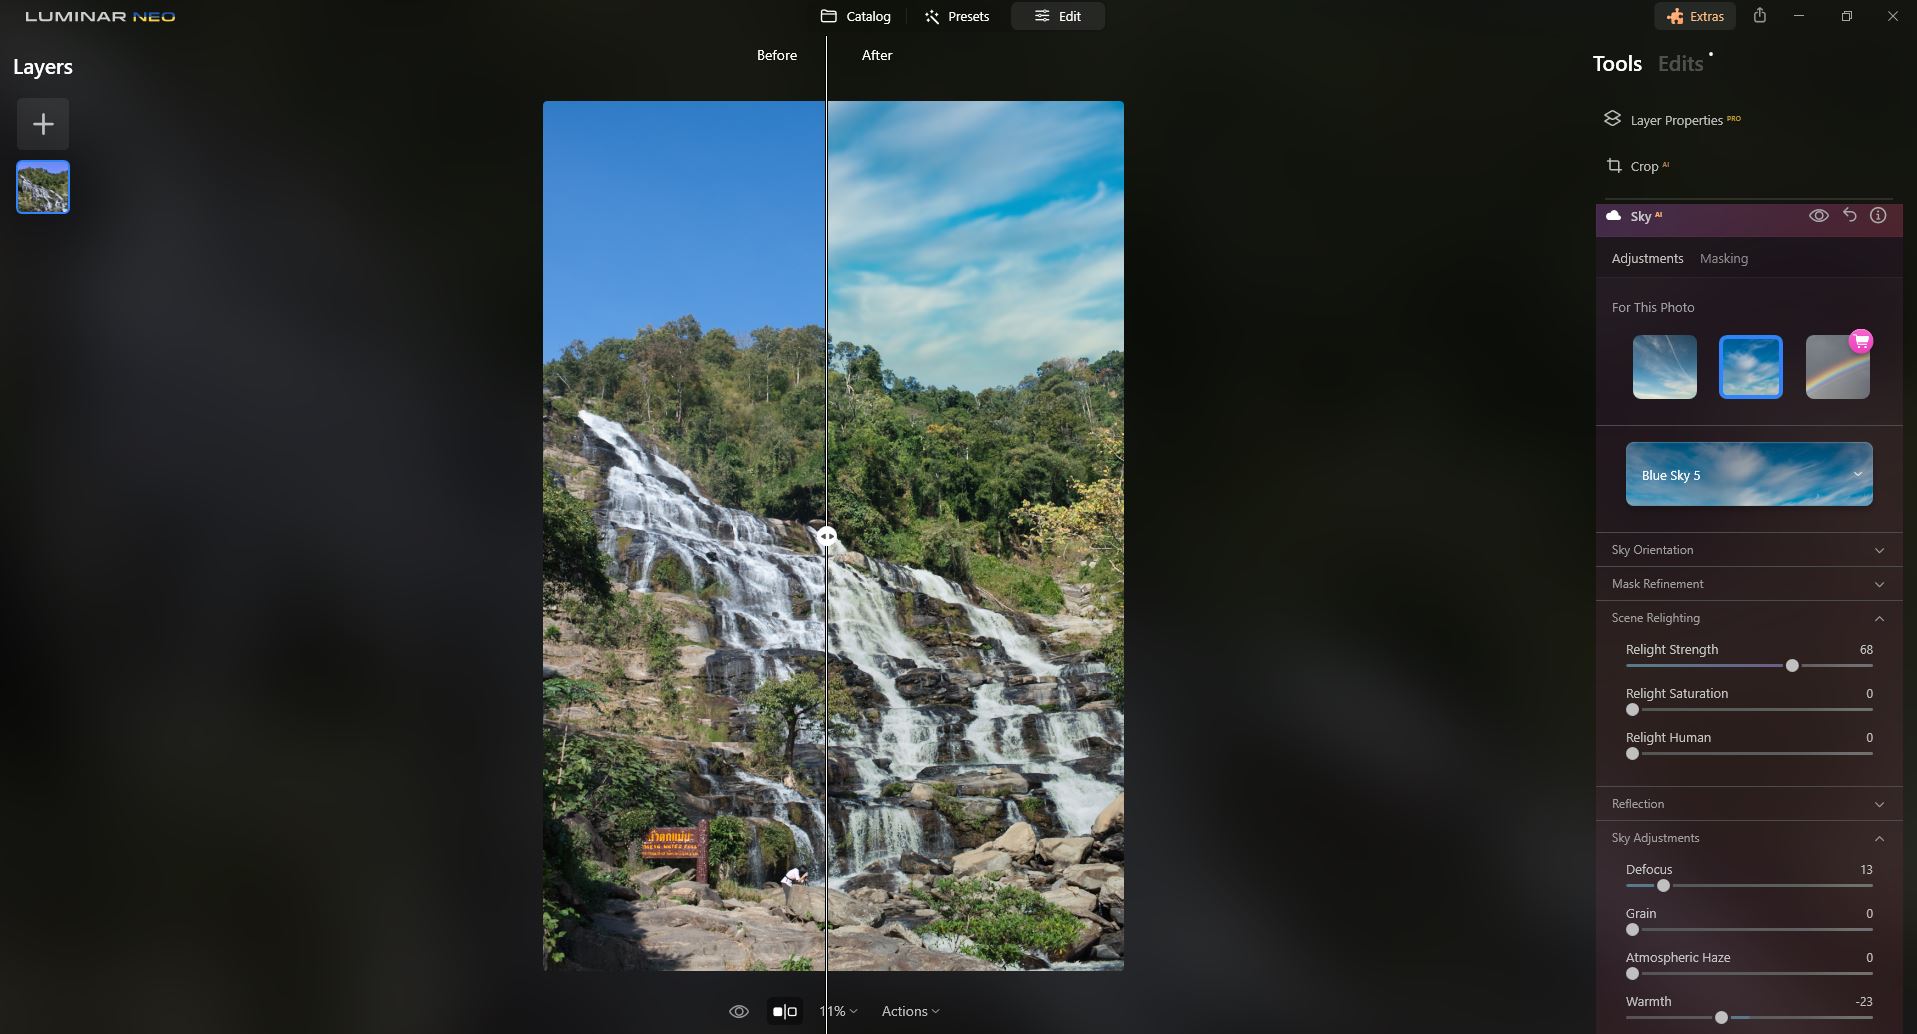
Sky AI
Do you have photos where the sky just doesn’t add to the atmosphere of the moment you’ve captured? Enter Sky AI.
With a single click, this tool replaces the sky in any photo. There’s a library of sky images of great variety to choose from. The AI also takes into account the nature of the scene and relights the entire photo to match the sky you’ve added.
Detecting the sky and replacing it has never been so precise. Luminar Sky AI even allows you to tweak the sky so it looks more natural. You have control over how sharp it is and even add some grain to match your original image if you want.
Luminar Neo vs Traditional Photo Editing
Luminar Neo takes more than the edge off learning how to edit your photos. Especially compared to using more traditional photography editing software.
I’ve had years of photo editing experience. I’m familiar with a number of different editing software programs and applications. But Luminar Neo was new to me. The first time I sat down to edit photos with it, I knew the most challenging thing for me would be to put aside my habitual editing routines.
Clearing my mind and starting afresh with Luminar Neo I found that it’s actually very easy to get used to. Whether you have plenty of editing experience or none at all, you’ll find this software delivers what it promises.
Those coming new into the world of photo editing will benefit by using the presets. The stunning artificial intelligence also creates appealing choices for you. These features show you what’s possible. As you edit more images and begin to develop a style of your own, you’ll naturally lean into making more manual tweaks.
As a more experienced photography editor you’ll find Luminar Neo is perfect for making quick edits. It’s also great for experimenting with different looks for your photos. Professional photo editing with Luminar Neo is efficient cost effective.
I’ve found it’s a great addition to my suite of editing software. This is because it opens quickly and allows me to add a little more pop to my edits, particularly when processing images for posting on social media.
Luminar Neo pricing offers some attractive options. Check out the website today and begin to experience the exciting world of AI photo editing. Sign up using this link and you’ll save 10%.